Versions Compared
| Version | Old Version 1 | New Version Current |
|---|---|---|
| Changes made by | ||
| Saved on |
Key
- This line was added.
- This line was removed.
- Formatting was changed.
| Panel | |||||||||||||||||||||||||
|---|---|---|---|---|---|---|---|---|---|---|---|---|---|---|---|---|---|---|---|---|---|---|---|---|---|
VetView's hospital system is intended to be utilized by multiple users and departments with workflows that should prevent duplicate clients, patients, and episodes. However, mistakes do happen, and when a duplicate of any or all of these parts of the system is accidentally created, VetView provides a means for you to merge the duplicated information back together without losing any data.
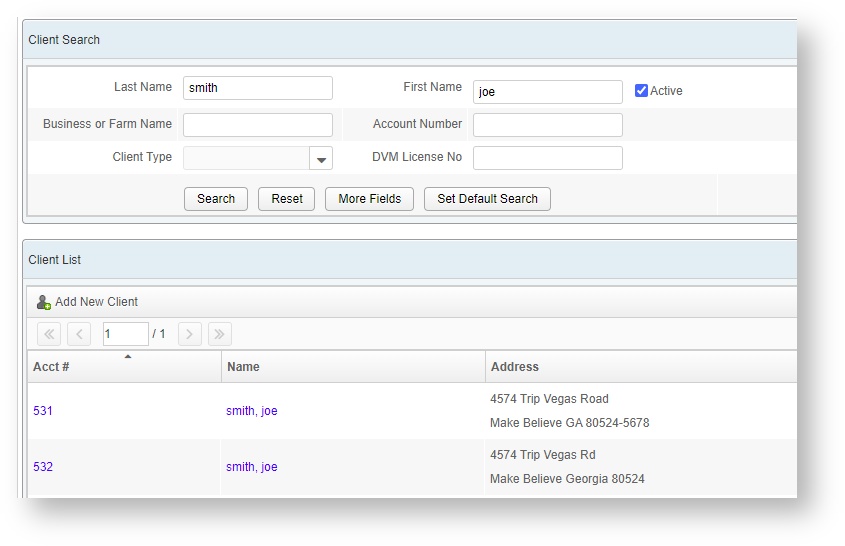
Merging ClientsFirst, identify the two clients who will need to be merged. Under Client Search, enter any common parameters such as first name and last name. (Click on More Fields to search by other options, such as address or phone number, if you end up with too many results.) In this example, it is clear that these two clients are most likely the same person. To make look up easier, write down the numbers of the two matching clients.
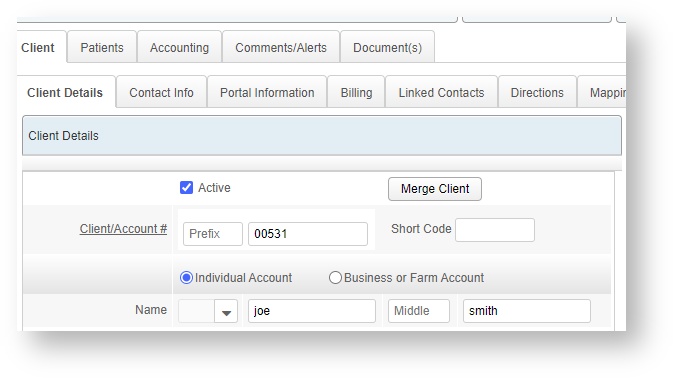
Open the Client Details of one of the two accounts by clicking on the Account Number. If you have the Admin Merge Client privilege, then the button for Merge Client will appear on the first tab.
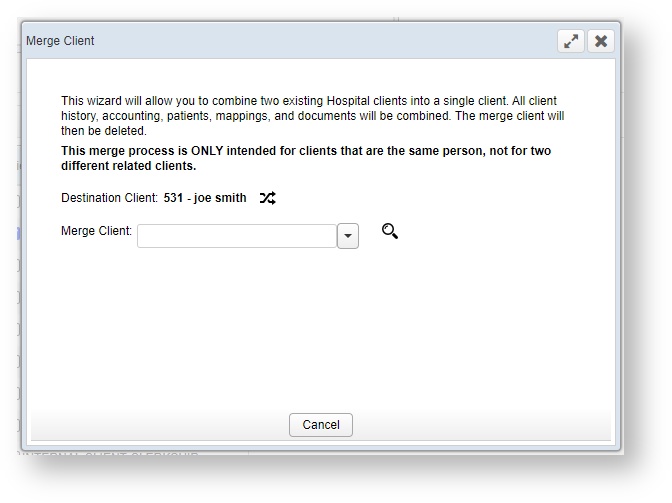
This will open the Merge Client Wizard.
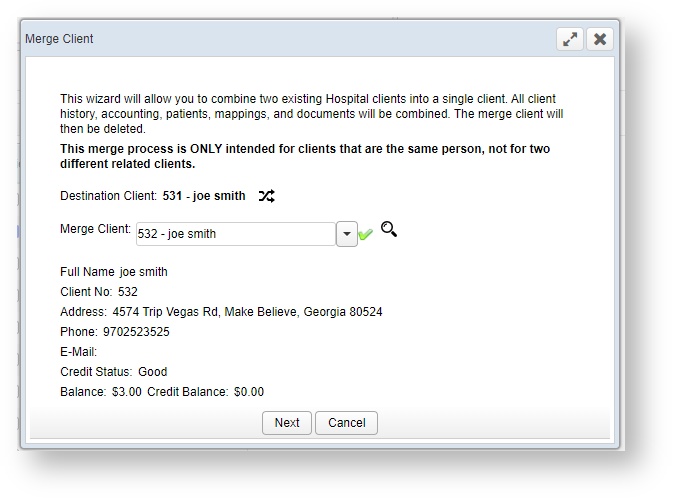
Look up the second client you intended to merge. (If you wrote down the number on the search screen, enter in the client number and the Smart Search box should immediately display it. Otherwise, manually look it up with the client's name.) Additional client details will load to allow you to confirm it is the correct Merge account.
You can switch the two if you started from the other client's screen. Click on the swap icon to change them.
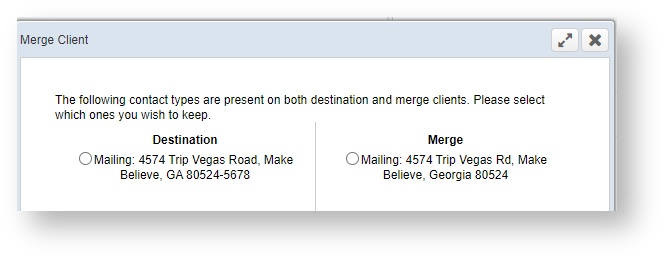
When you are satisfied that you have the correct Destination client and Merge client, click on the Next button to continue the wizard. If information is present for both clients, you will be asked to select what to keep. In this example, both the Destination and the Merge client have a mailing address. Pick the correct one. If they are identical, keep the Destination client.
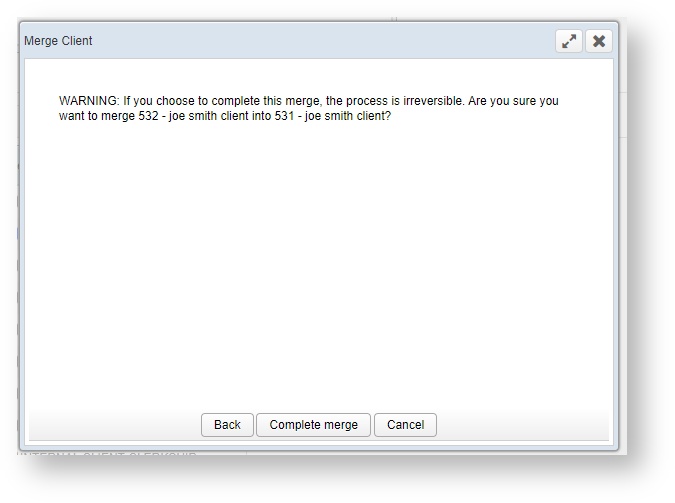
Click on the Next button to move forward and continue selecting the correct pieces of information. Once all pieces have been verified, you will reach the final screen that contains a warning that this process is irreversible:
After completing the merge, the following will have occurred:
Merging PatientsIf a patient has been added to the system twice, they can be merged together, combining all appointments, episodes and information into a single patient going forward. (If the Client and Patient were both duplicated, then the patients will both appear on the Destination client's page.) Continuing with our example above, merging Client 531 into 532 combined the patients. Now the patient Fluffy is listed twice on their Patients tab. Write down the case numbers of the patient you want to merge for easier look up.
Click on the Patient Case Number or Name for one of the patients you want to merge. This will open the Patient Record.
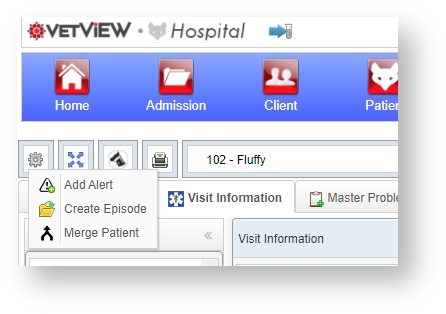
In the upper left hand corner, there is a gear icon that contains administrative patient record options. Select Merge Patient from this list. You must have the Merge Patients privilege under Role Management to see this option.
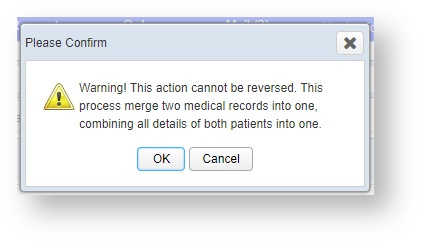
A warning will appear that this process cannot be reversed.
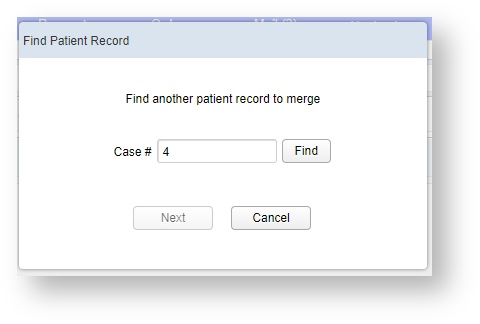
After clicking OK, you will be presented with a window to look up the second patient. Enter in the other case number you wrote down earlier, or look it up by patient name.
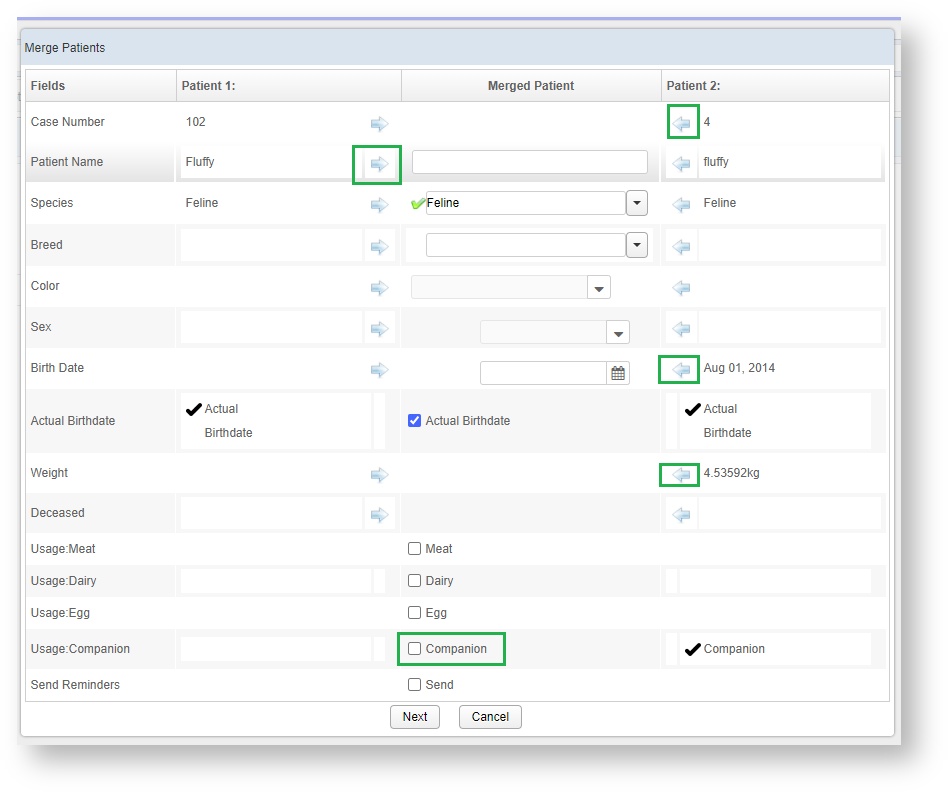
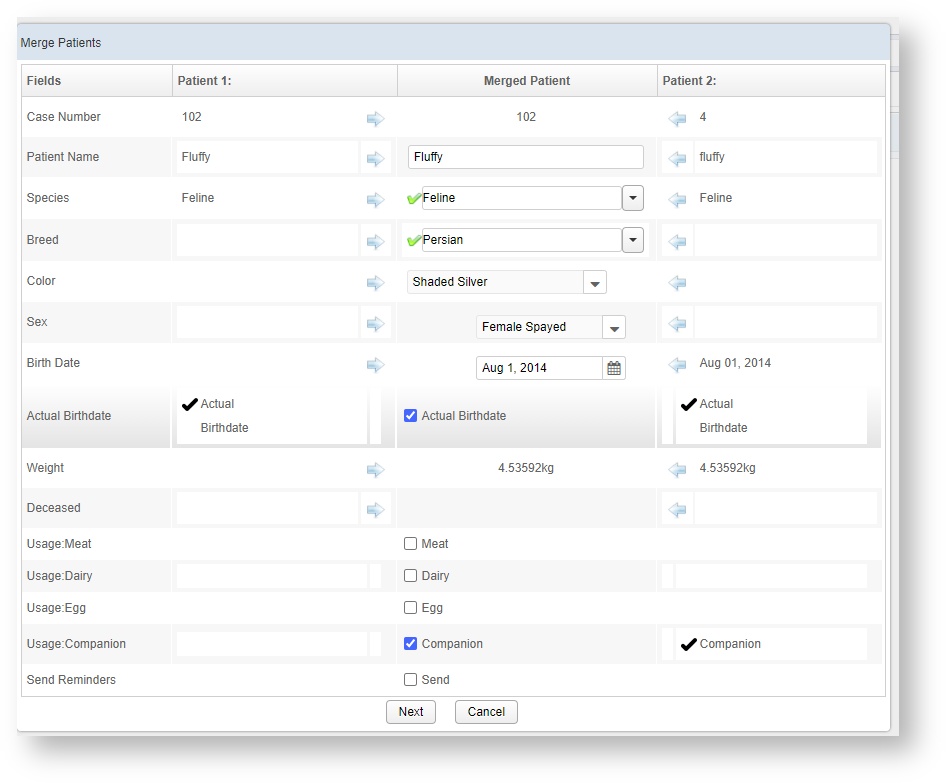
The Merge Patients dialog box will open. This window has a list of all the information for the two patients in such a way that you can do a side by side comparison of the data, and confirm which information between the two of them should be kept. Click on the blue arrow from either Patient 1 or Patient 2, depending on which is the detail that should be applied to the future merged patient. There is no right or wrong way to choose in the system, so selections should be made based on your hospital's policy (such as always choose lowest Case No.)
You can also take this opportunity to fill in any additional known information, such as breed or sex, if neither of the original patients had that information recorded.
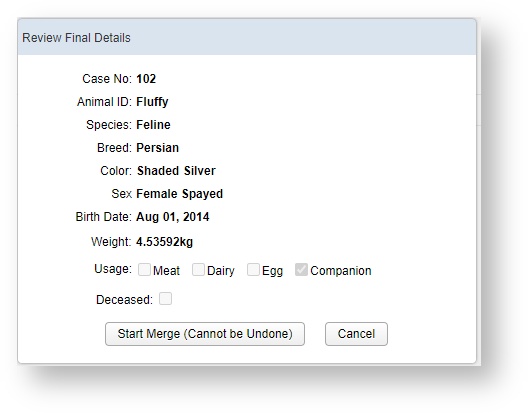
Click the Next button when you are finished adding the patient details. A final screen will appear for you to verify all the details before starting the merge process.
Click on the Start Merge (Cannot be Undone) button to complete the Merge Patient process. The patient record will briefly close, and then reopen with the Case Number and patient details you selected. All episodes for both patients will now be consolidated on this new single patient record. The merged patient record will be deleted. Merging EpisodesIf two episodes were created for what should have been a single patient visit, and both episodes are actually opened with information on them such as documents, requests, or prescriptions, the episodes can be merged together. (If there are no items added to the second duplicate episode, it may be easier to Delete Episode.) Merge Episode preserves all the information that was on both episodes, preventing your team from having to repeat work that was already completed.
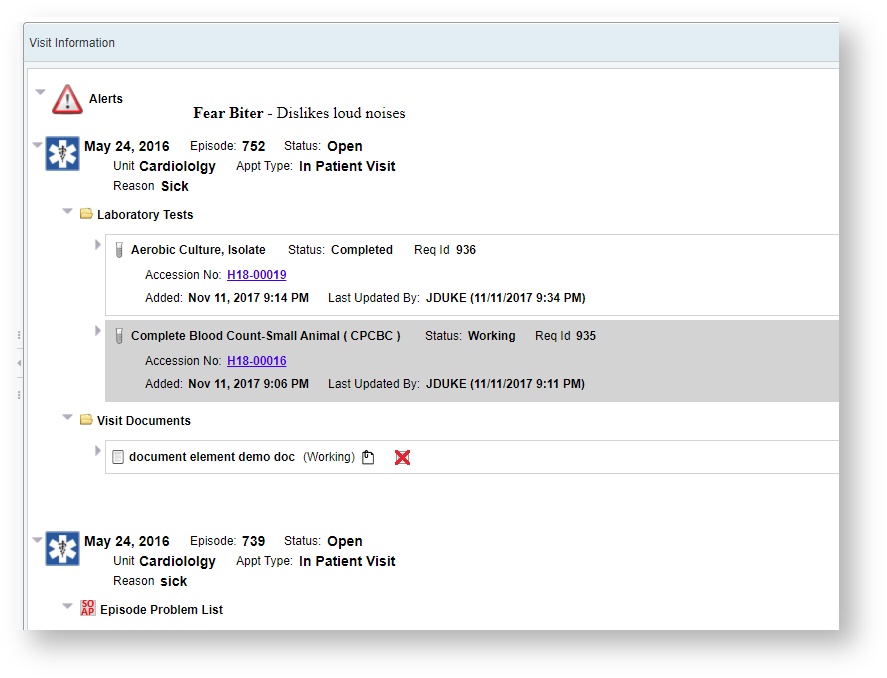
Identify the two episodes you need to merge. In the example below, the two episodes to merge occurred on the same day, for the same unit, for the same reason, indicating that the second episode was opened by mistake. One episode has the Problems, whereas the other one has the labs and a document. We want to preserve all completed sections of both episodes, so we will need to Merge Episodes.
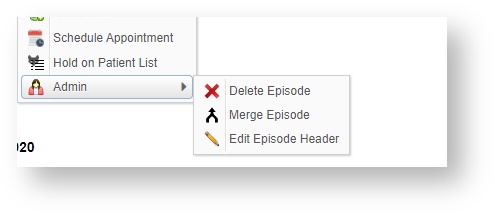
Right click on the Episode Header to open the Admin section. You must have the Merge Episodes privilege to see this option.
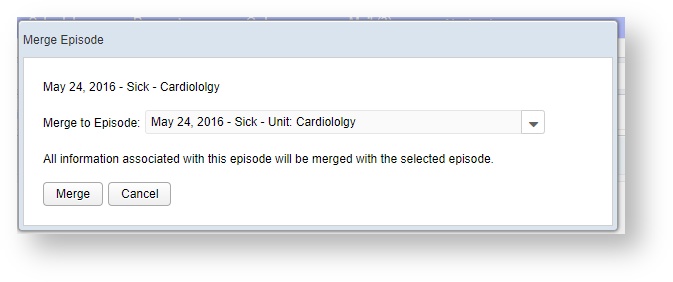
A window will open with a drop down menu listing all the episodes on the patient record. Select the episode you wish to merge into this one.
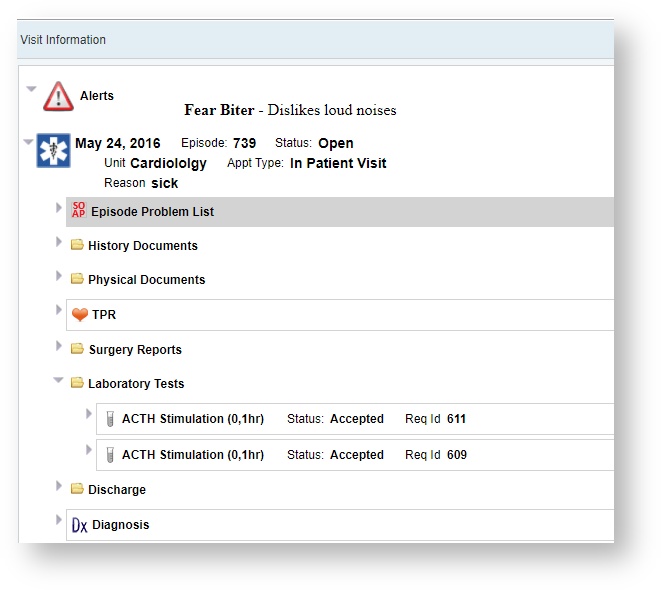
After clicking on Merge, the patient record will briefly flash and then reload, with the single combined episode now available on the patient record. Our example has the Episode Problems, all the documents, and the Lab Tests available from both episodes.
If any documents or requests did get duplicated as a result of the Merge process, an administrator can further clean them up by deleting the extras. Deleting requests may prompt for a reason for deletion.
All charges on both episodes will appear on the Patient Orders. You should View Order and delete any duplicate charges if needed.
|
| Insert excerpt | ||||||
|---|---|---|---|---|---|---|
|
| Panel | ||
|---|---|---|
| ||
|
