- Created by Cathy Allison , last modified on Jul 07, 2022
You are viewing an old version of this content. View the current version.
Compare with Current View Version History
« Previous Version 4 Current »
Hospital Portal (3.1)
The Hospital Portal is an external website that outside clinics, RDVMs, and owners can use to check on the status of a patient who was referred to your hospital, and to view the patient's medical records.
Your hospital has full control over what portions of the Patient Record are public and at what status, via the Medical Record Setup tab in your Hospital Setup.
Main Login Screen
The URL provided by your Hospital will go to a login page. If you have not already requested access to the Hospital Portal, you can do so by clicking on the Register button.
If you already have access, enter in the username and password provided by the hospital to enter the portal.
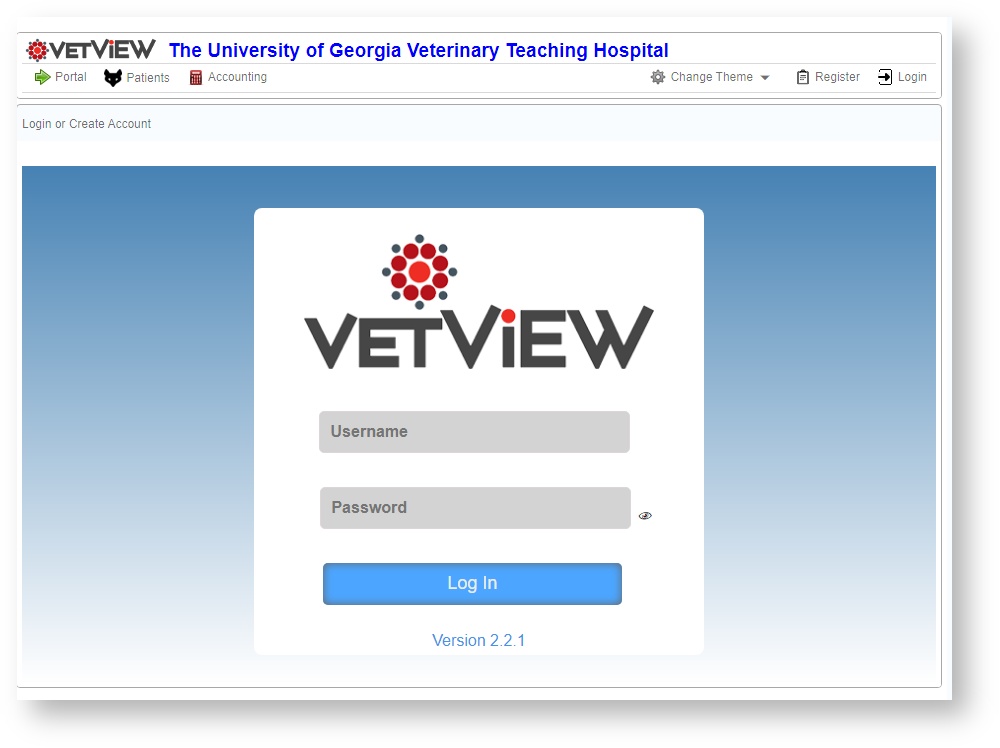
| Field/Button | Description |
|---|---|
| Hospital Name | The name of the hospital will display on the upper line of the screen. Depending on the Portal Setup, a logo may appear in this upper left corner as well. |
| Custom URL | The left most button will display a custom URL that can be set to take you to the Hospital's main web page or any other web page. On this example, it displays the word "Portal" and goes to this instruction page. |
| Patients | This button goes to the Hospital patients screen, once you have logged in. |
| Accounting | This button goes to the Hospital accounting screen, once you have logged in. |
| Change Theme | This button allows you to change the theme of the Hospital Portal. Some things display higher contrast buttons, or larger text. Use the theme that works best on your device. |
| Register | This button loads the registration screen. If you do not have a Hospital Portal account yet, this button will load the screen to allow you to request one. |
| Login Button (Menu) | If you are on any other screen but the login screen, prior to logging in, this takes you back to the Login screen. Once you have logged in, it will become the User Info button instead. |
| Username | The username for the Web Portal Account. Note that the web portal accounts are different from the Main VetView Account logins, which are often associated with LDAP or CAS authentication and require that you be on the school network. Web Portal Accounts do not need to be accessed within the network, and can be accessed from any place with Internet access. |
| Password | The password for the Web portal account. Even if the username is the same as your main VetView account, the password may be different. Click on the small eye icon to display the password. |
| Log In (Button) | After entering a username and password, this will log you in to the Hospital Portal. |
Registration
After clicking on the Registration button, a form will load. Fill out the information and click on the Register button when you have entered everything.
Additional instructions may be provided by the Hospital on this screen. Please follow them.
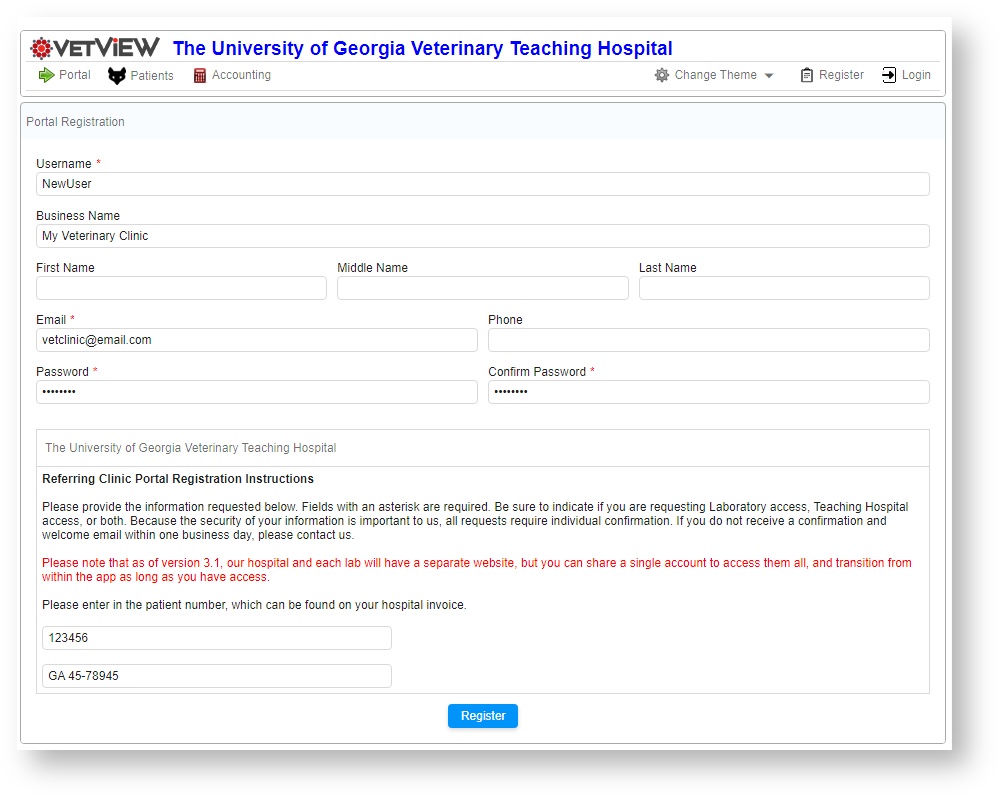
| Field/Button | Description |
|---|---|
| Username | Required field. The username you want to use to log in to the Web Portal. This can be anything that you can easily remember. |
| Business Name | If you are creating an account on behalf of a business, such as a veterinary clinic, you can enter the business name here. If you enter a business name, you do not need to enter a first name / last name. |
| First Name | If you are creating an account on behalf of an individual owner, you can enter a first name here. |
| Middle Name | An optional field if your personal account uses a middle name. |
| Last Name | If you are creating an an account on behalf of an individual owner, you can enter a last name here. |
| Email Address | Required field. The email address to which all correspondence associated with this web portal account will be sent. |
| Phone Number | An optional field to enter the phone number to associate with your web portal account. If we have trouble reaching you via email, this allows a second method of communication. |
| Password | Required field. The password that will be associated with the username. Specific requirements for each password are set by the hospital, but generally they will ask for a mixture of upper case, lowercase, special characters, and numbers. |
| Instructions | Additional instructions provided by the Hospital. They will explain how long to expect the account provisioning process to take, and whom to contact if you don't hear within that time frame. |
| Patient Number | The patient number associated with the patient that you sent to the Hospital. This will usually appear at the top of your invoice. This is used to ensure the correct VetView client account is linked to the web portal account. |
| State Veterinary License | If this account is on behalf of a clinic or an individual DVM, please enter the state veterinary license. This allows us to ensure the client account in VetView has the permissions required for your state, such as approving outside prescriptions. |
| Register Button | Clicking this button will start the registration process. If there are any missing fields, an error message will appear on the field that is missing, and then you can try to submit again. |
Lab Access
After you have logged in, if you have access to a lab within the hospital, you can switch to the Labs Portal to view more detail about the status of lab requests and accessions.
Any lab for which you have access will appear under the User Information drop down menu. In this case, the logged in Hospital account also has access to Diagnostic Lab and Infectious Diseases Lab.
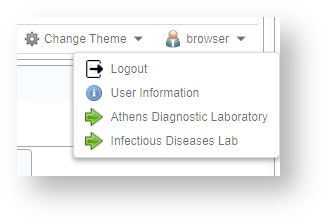
| Button | Description |
|---|---|
| Username Menu | Clicking on your username (or the "Menu" button in small format screens) will display a drop down menu. |
| Lab Name | The names of any labs you have access to will appear in this list. Lab access is shared across the username you have registered, but requires that it be granted by the lab for it to be available. Not all labs associated with the same university or teaching hospital as your hospital portal account will make their lab portal public access. |
User Information
If you click on the User Information button on the menu, you can change the information associated with your Web Portal Account. For example, if your clinic has had a name change or a new person will be in charge of the account, you can change the name and change the password on this screen.
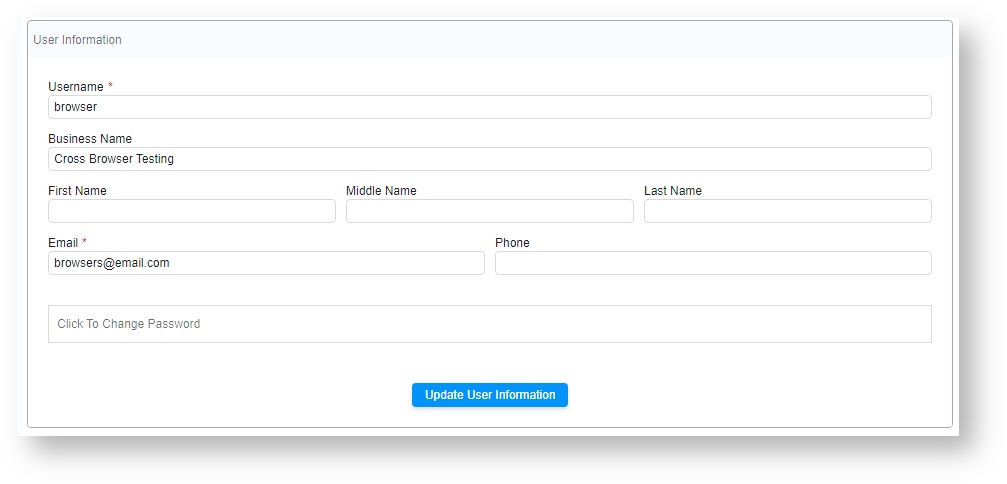
| Field | Description |
|---|---|
| Username | The unique username that is used to gain access to your Web Portal Account. If you want to change it, you can do so on this screen, as long as the new username has not already been taken. |
| Business Name | The business name associated with your account. If your external clinic has a name change, you can change it here without having to create a new account. |
| Client Name | The first name, middle name, and last name associated with an individual client account. If you have a full name, you do not need a business name, and vice versa, but at least one of the two fields must be entered. |
| The email address associated with the Web Portal Account. If you want to change it, you can do so on this screen. For a business account, you can change this if the person responsible for communications with the lab or hospital has changed. |
Change Theme
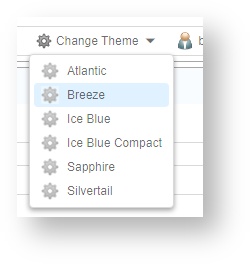
To better support each person's individual preferences and visual needs, you can change the color theme of the Web Portal. Once changed, your account will remember the last theme you used when you next log in.
Certain themes will also use a larger font or higher contrast labels, to make it easier to see the text on the web pages.
| Button | Description |
|---|---|
| Change Theme | Displays the list of available themes for this Web Portal Account. |
| Theme Name | Click on a theme name to change the Web Portal layout to reflect the theme. Your account will remember the last theme you used, and display that the next time you log in. |
Patients Screen
Once you have logged into the Portal, the Patients screen will automatically load. This screen contains a list of all the patients associated with your client account.
Patient List Filters
If you have a long list of patients, you can narrow down your search by entering in a patient name. You can also narrow results by the case number, the client (owner) name for the patient, or the dates that they were seen at the Hospital you are viewing.

| Field | Description |
|---|---|
| Patient Name | Search for results based on the patient name. |
| Case # | Search for results based on the patient number. |
| Client Name | Search for results based on the client name - whether that is a specific RDVM at your clinic, or the owner of the patient. |
| Received Date | Search for results based on the episode start date for the patient visit. |
Patient Record Overview
Click on the Patient case number or name to open their Patient Record in the portal.

The overview of the patient record will load. This screen contains basic information about the patient - the hospital visits on record, any prescriptions and vaccines, upcoming appointments and patient reminders, and any lab results.
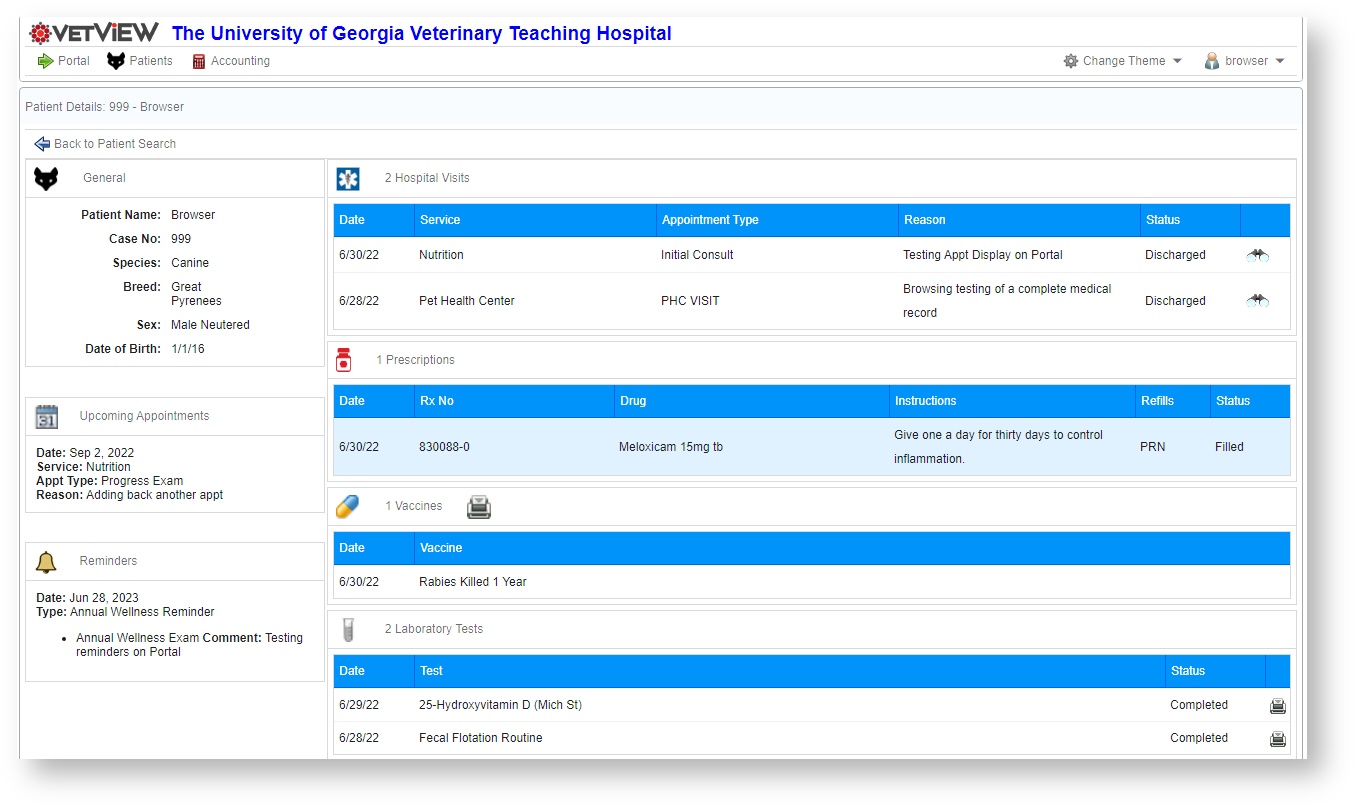
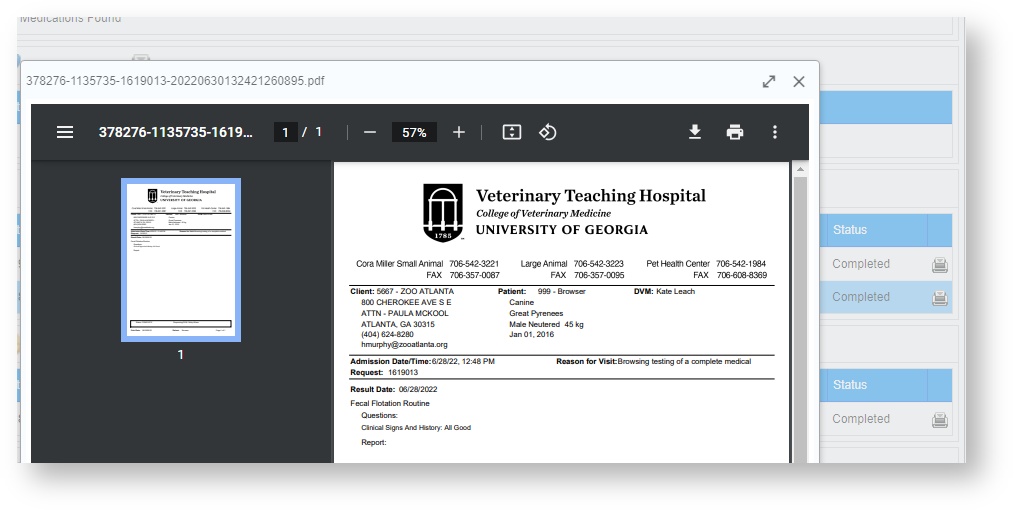
To view more details about a section or to print the report, click on the printer icon next to the section on the patient record overview to open a PDF.
| Field | Description |
|---|---|
| Back to Patient Search | Returns you to the search results if you selected the wrong patient, or if you have finished examining the details of this patient. |
| General | A brief demographic overview of the patient information as it is recorded in your VetView Hospital. If any of this information is incorrect, please contact the hospital so it can be fixed within the main system's patient records. Once it is fixed there, the changes will reflect automatically on the portal the next time you log in. |
| Upcoming Appointments | Displays any upcoming appointments for this patient. The date, the service, appointment type, and reason will also display. |
| Reminders | Displays upcoming reminders for this patient. Reminders will be automatically sent out prior to the due date, or the service may call you directly with the reminder. |
| List of Hospital Visits | A list of the hospital visits that VetView has on record for this patient. The date, the service, the appointment type, the reason, and the visit status will all display. |
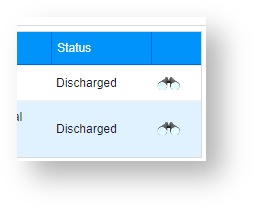
| Patient Record Details | Click on the Binocular icon to view more details about a specific episode. |
| List of Prescriptions | This section will display all the active prescriptions available for the patient |
| List of Vaccines | This section will display all the recent vaccines issued for the patient. |
| List of Lab Test | This section will display all the lab tests that were ordered for this patient. Click on the printer icon to open the Accession Report for the patient and view the lab results. |
Patient Record Details
If you want to see more details about a specific episode, click on the binocular icon next to the episode status on the right side of the episode.
The episode screen will load. It is similar to the patient overview screen in layout, but includes reports such as Discharges or PA forms, and limits medications and prescriptions to only those given during the course of the episode.
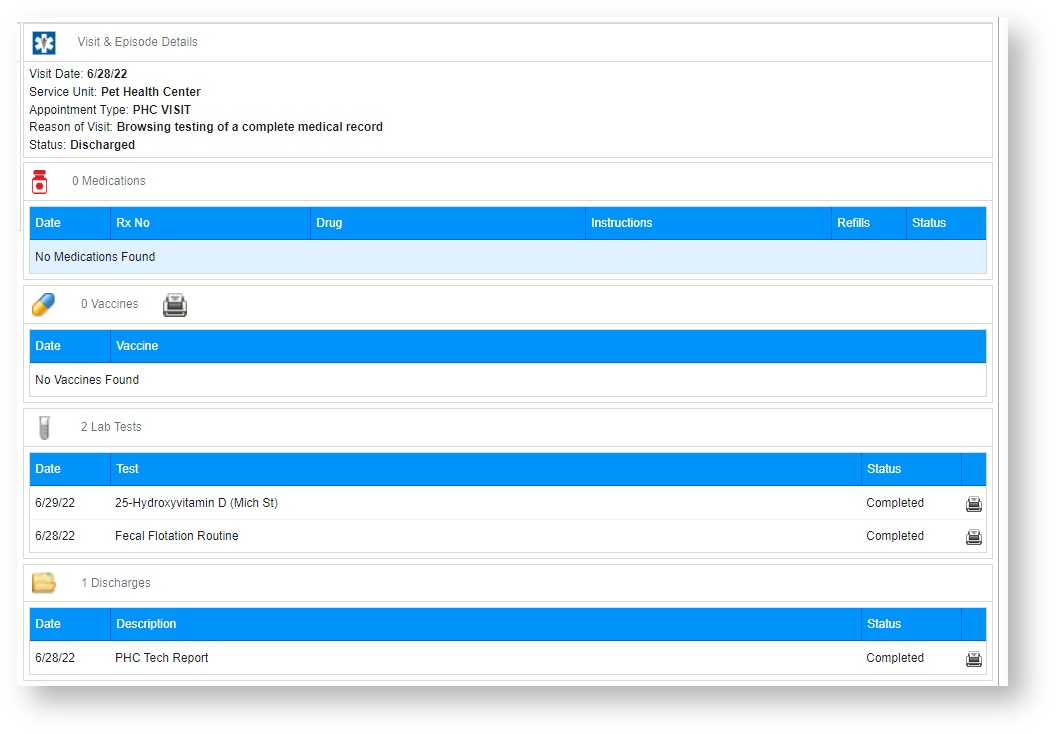
Click on the printer icon to open a printable PDF of the documents. Note that some documentation may be hidden by the hospital, and unavailable on the Hospital Portal.
Accounting Screen
If your hospital has enabled Accounting, you can view your past invoices and payments via the Accounting screen.
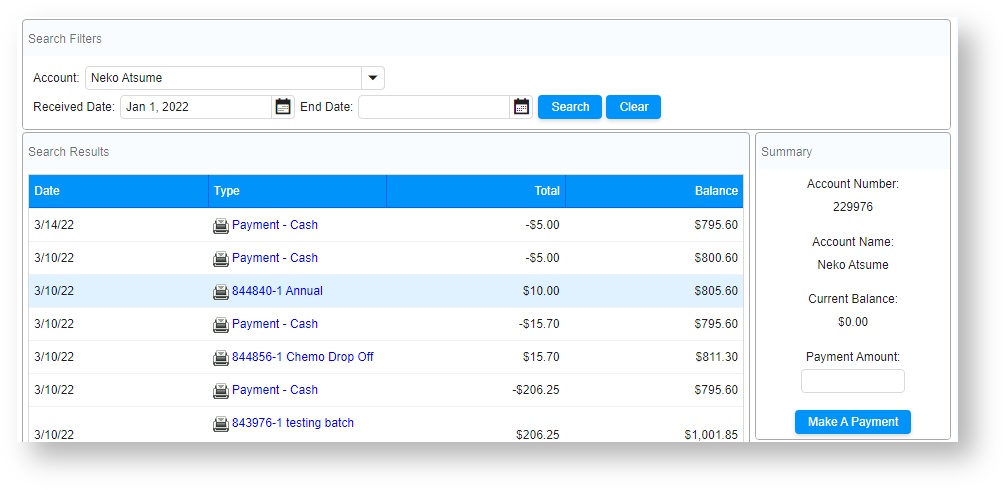
If multiple client accounts are associated with your web portal account, you can choose the correct account in the drop down menu. For example, if each RDVM has their own account with VetView at your hospital, they will display in this list.

| Field | Description |
|---|---|
| Account | A drop down menu to select a specific account, if multiple hospital accounts are associated with your web portal account. If there is only one account, this will be defaulted to that one account. |
| Received Date | Limits accounting information to the visits within a specific date range. By default, this will load as January 1st of the current year. |
| Search | Displays the results within the matching account or date range. |
| Clear | Clears the previous search filters. |
List of Invoices
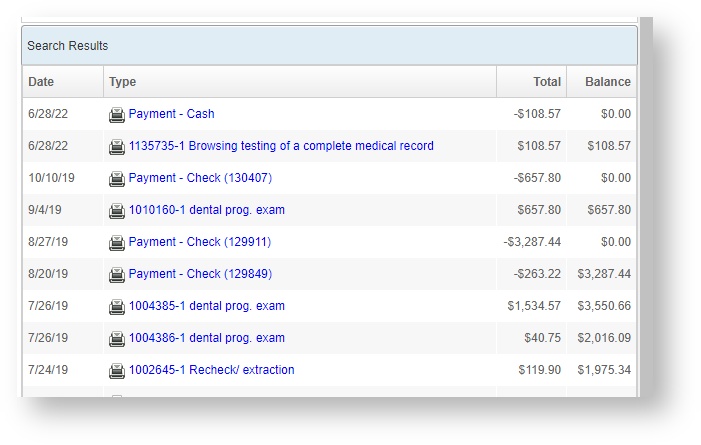
Click on a specific payment type or the printer icon next to the name in order to open the PDF of the invoice.
Make Payment
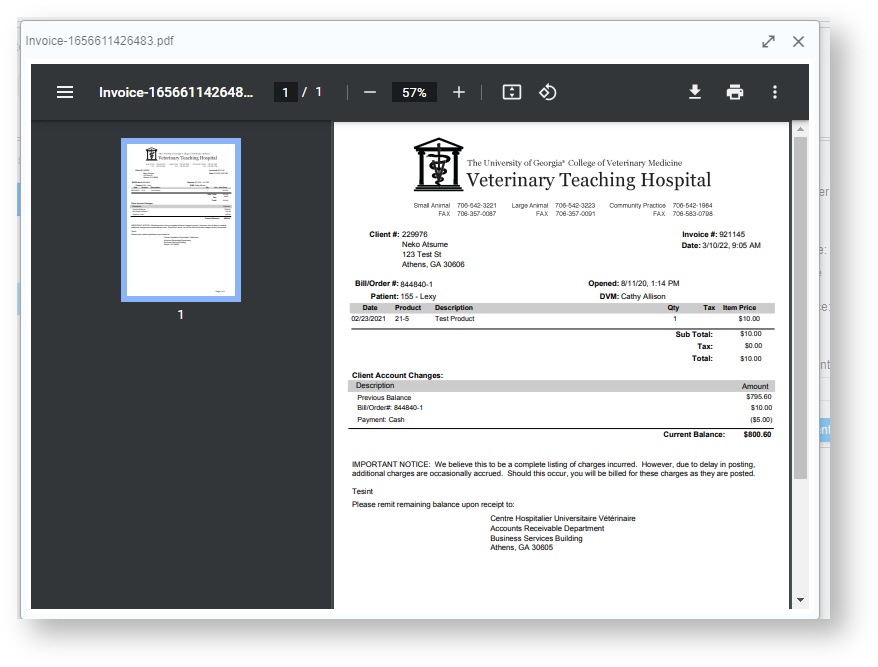
You can make a payment by printing the invoice and following the instructions listed to remit a check or make a credit card payment over the phone.
Or, if your hospital has enabled it, you can make a payment using the hospital's third party credit card processor online.
This payment form will appear either to the right of your invoices, or on the bottom.
| Field | Description |
|---|---|
| Date Column | The date of the statement, payment, or invoice. |
| Type | The number of the appointment invoice, or the type of payment applied. Click on the payment or invoice name to open the PDF, or click on the printer icon. |
| Total | The amount of the invoice or the applied payment. |
| Balance | The remaining balance on your account after a payment was applied. |
| Summary | The information for your account, if you are going to write a check or process an online payment. |
| Make a Payment Button | If your hospital has enabled online payments, entering in a value into Payment Amount and then clicking on Make a Payment will open the third party credit card processor in a new tab. |
VetView Wiki Most recent releases of VetView: Version 5.0.2 and 4.2.8 Hotfix (Released 12/20/2024)
To see commonly used terms in VetView Hospital, please visit our Hospital Glossary of Terms.
- No labels