How To Create a New Test
- Checkmarx Bot (Unlicensed)
- Cathy Allison
- Rainey Lynch (Unlicensed)
- Andrew Hanneman
How To Create a New Test
How Do I Create a New Test in VetView?
In VetView, a Test is a collection of Results. These are linked in our database to a Catalog Item, which connects the charges in the form of a Product to the actual Test that will be performed.
The first thing you will need to do is identify the Results that your new test will need. For machine documentation (e.g. PCR tests or automatic CBC tests), the results will often be output in the form of a CSV file. Other results might be the organism identified on a bacterial culture, or a simple positive or negative for rapid tests.
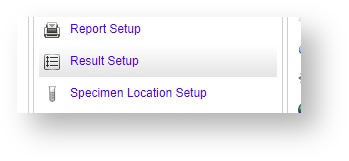
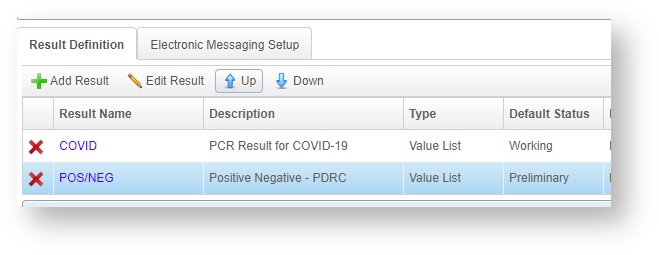
Check for existing Results under the Result Setup screen. Results can be re-used from test to test, so if a different test previously used that result, you can use it again and not have to make new ones.
How do I add a new result?
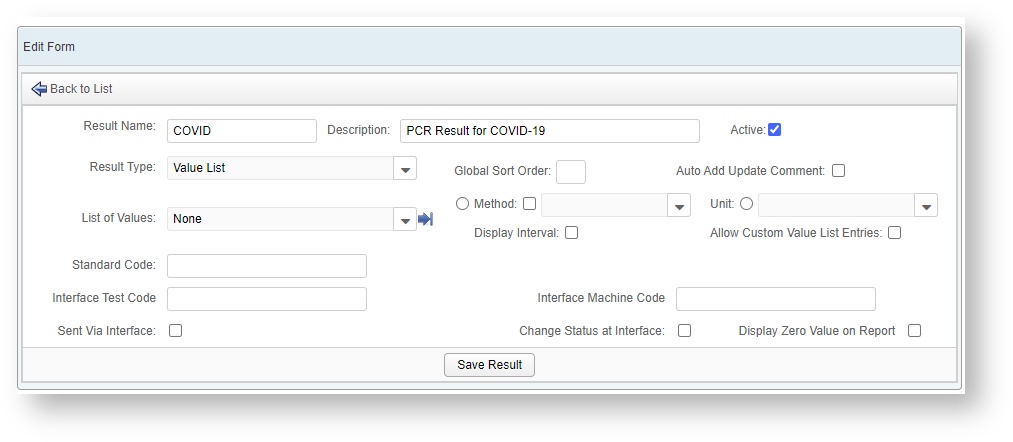
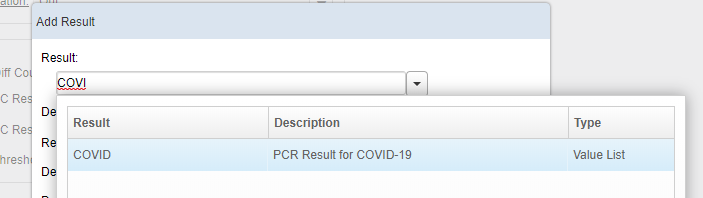
If you search for Results and don't find a match for what your new test requires, then from the Result Setup screen you can click on Add Result to start the process of creating the result you need.
For example, if your lab has started human testing for COVID, you can add that as a result in preparation for adding it to a new test.
What are the available Result Types?
The available Result Types in VetView are:
- Value List (customized under Value List Setup)
- Number
- Pattern (for Isolates and other cultures)
- Image (for histology slides and other visual tests)
- Date
- Rich Text (for long form descriptions that may require formatting)
- Text (short text box that does not need formatting)
- Signature
- Report Info
- Time Stamp
For machine tests, you can select the Method (which is customized in VetView under Method Setup.) For manual tests, you can select the Unit of the test instead, such as the count or the measurement.
If your test has the option of receiving results through VetView's API (such as Idexx machines) you can indicate that the test result is Sent Via Interface. Contact Jeff if you need help configuring the VetView API for machine results via interface. Not all machines can talk directly to VetView from the API, but we are adding new web service calls every day that may allow for your school to build its own interface if necessary.
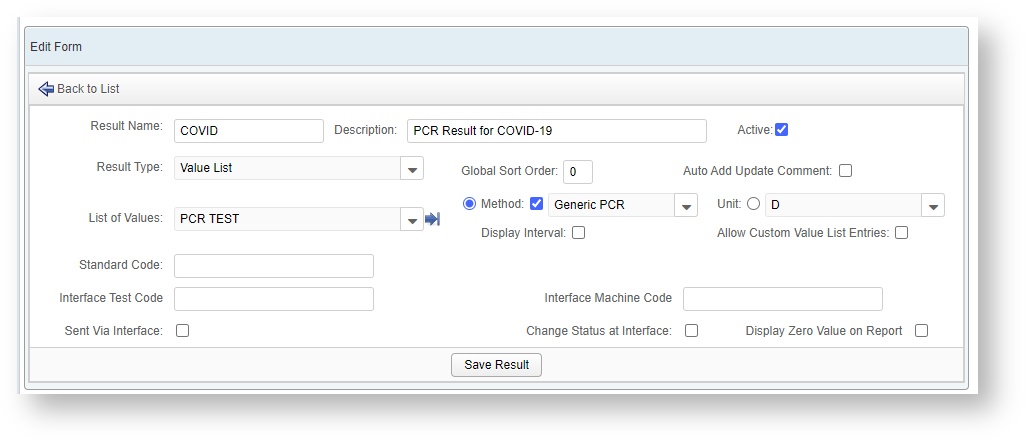
Click on the Save Result button to recreate the result in VetView and make it available to the Test Setup screen.
How do I add my Results to the New Test?
Once you have verified that the result you will need to populate your test are created, you can being creating your new test.
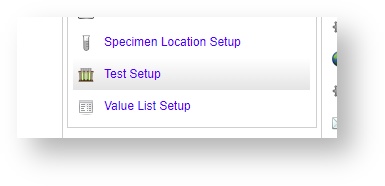
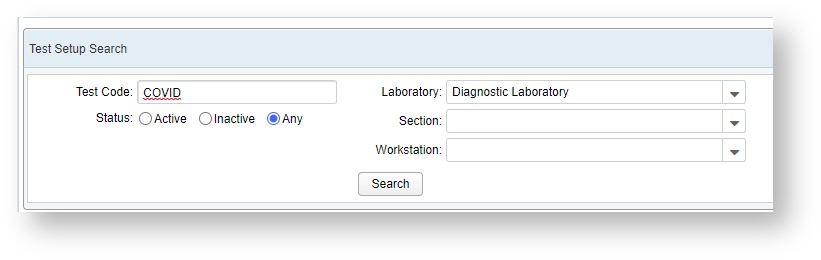
Go to the Test Setup screen.
Search for the name of the test you want to create to verify it has not already been used or created.
Search First
Always search for the test first to be sure another user has not already created it. Though products can be created without an associated lab, tests are associated with a lab. Be sure to consider this when searching for a test.
If the test you need does not exist, click the "New Test" button shown above. This will open the New Test Screen.
Enter in the Test Name, and the Lab, Section, and Workstation. These fields are the minimum required to set up the new test.
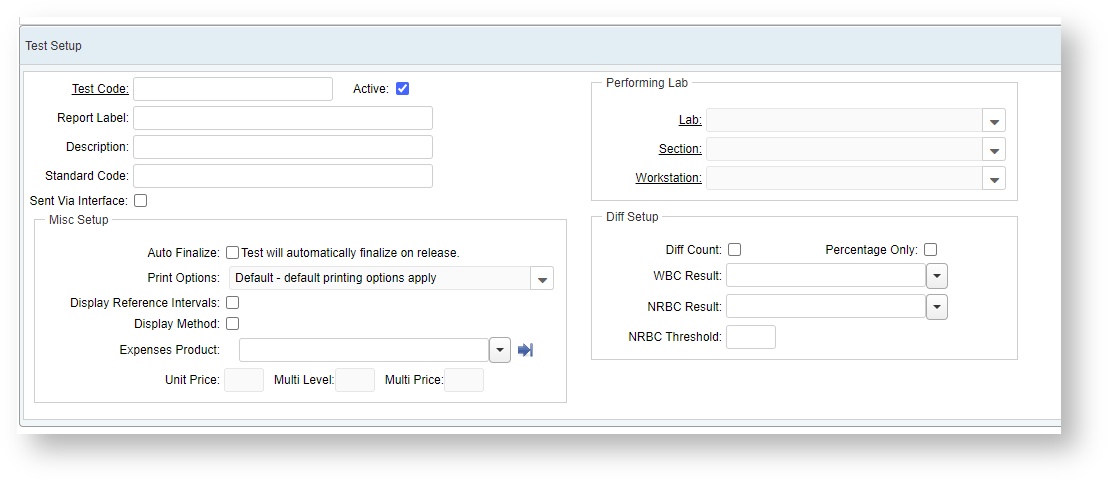
Under the Misc Setup section, you can determine if the test will auto finalize on release (for all-in-one accession receiving and processing), whether the test should display the reference intervals for its results, the method for the result, and any extra fees that should be charged for this test under the Expenses tab (e.g. a bio waste disposal fee for specimens after testing is complete.)
For blood Tests that have results that can be counted using a Diff Counter, you can enable the counter and specify WBC and NRBC results.
You must Save a test before you can add any results or subtests.
How do I assign my Results to the new Test?
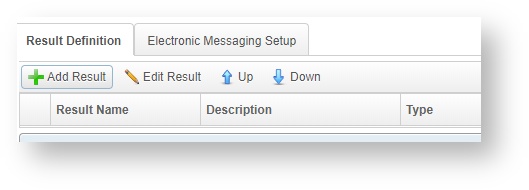
Click on the Add Result button to start adding results on the test.
The Result Search on this window is a Smart Search box, so you can type in the first few letters of your result to find all matches.
You can choose a Default Result Value, a Default Result Status, a default Report Format, and also choose to include the test label (Tube # or Well #) and show or hide the Result on worksheets or Print Result Comments.
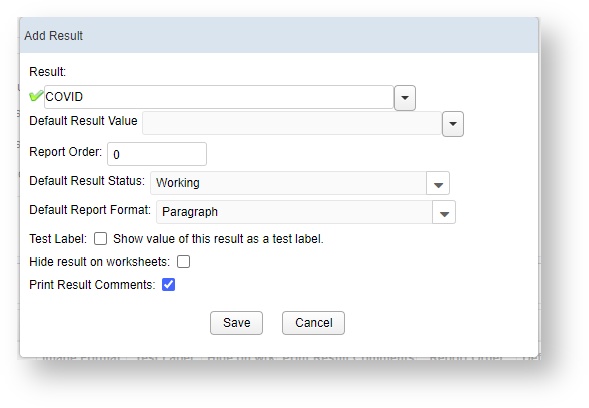
Click on Save to add the Result to the Test.
How do I Sort my Results on my Test?
If you added the results in a different order than you want them to appear on the Test or the Report, you can sort them.
Click on the row of the Result you want to change, then click on the Up or Down buttons to change the sort order.
How do I add a Sub Test to my Test?
If a secondary test will be performed based on the results of the first test, you can designated that as a Sub Test. For example, if you have an Isolate that will be performed secondary to a Bacteria culture, the Isolate could be set up as a secondary test. This allows the lab tech to add the test on the Accession without having to modify the accession itself.
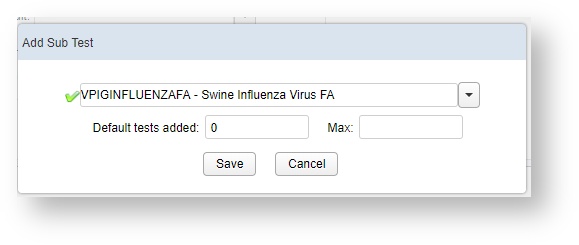
Click on Add Sub Test to select the additional test to be performed.
How do I add a sub test for an Aerobic Culture with Bacterial Isolation and Sensitivity?
For Bacterial Isolation tests, there is additional setup that is required.
VetView recommends having Isolate as a discrete test that can be added as a sub test. This way it can be reused across multiple different culture tests without redundant setup.
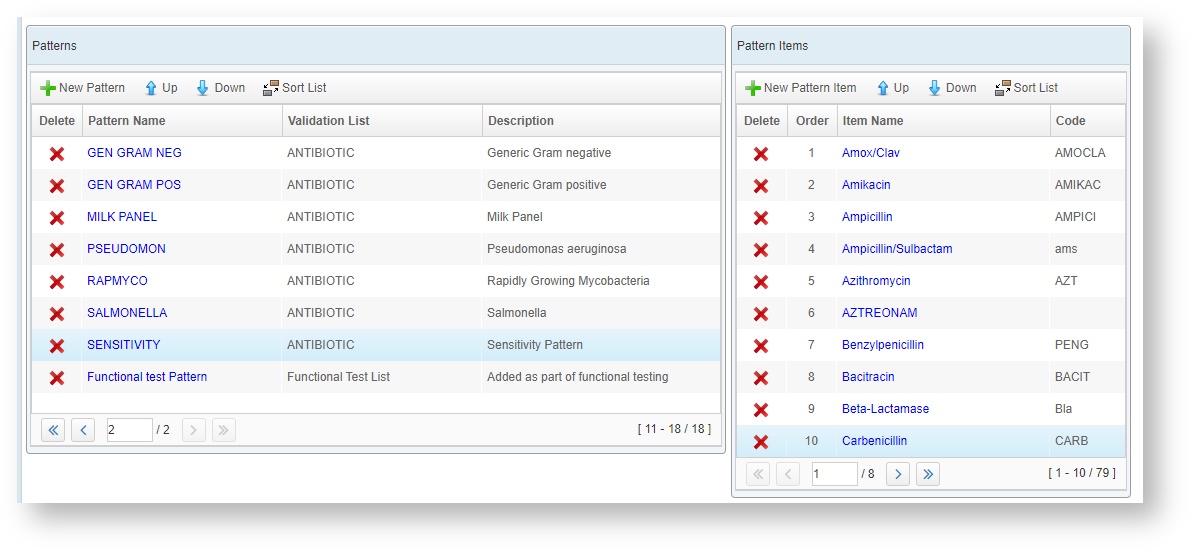
Sensitivity Pattern Setup
The Isolate test will need to have a result type of Pattern set up as Sensitivity with the various antibiotics you will use as pattern items. See the Lab Pattern Setup screen for more information.
Sensitivity Result Setup
Once you have created your Sensitivity Pattern, it can be added as a Result Type of Pattern under Result Setup. See the Lab Result Setup screen for more information.
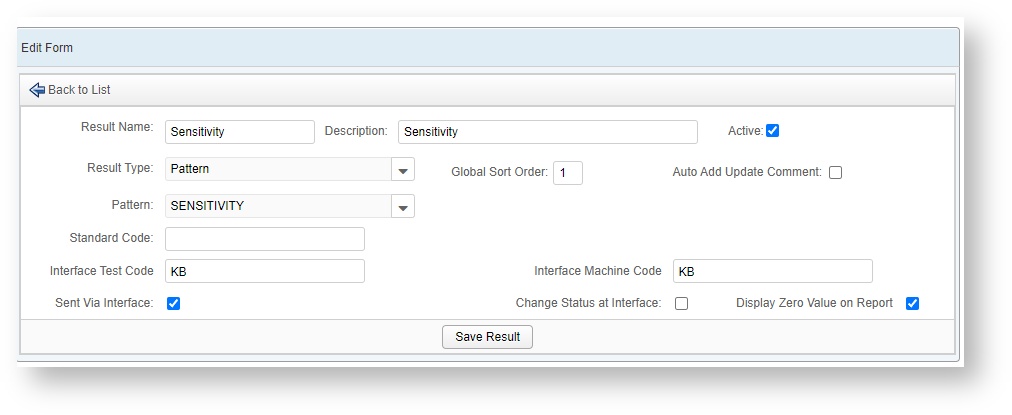
Interface Codes
The Interface Test Code and Interface Machine Code are for use if the Sensitivity test will be performed by a machine, such as Data Innovations.
Isolate Test Setup
Create a new test for your Isolate. Add the Sensitivity Pattern Result to the Result Definition, and any other results that will be used in all Isolate tests, such as a comment or an Organism value list.

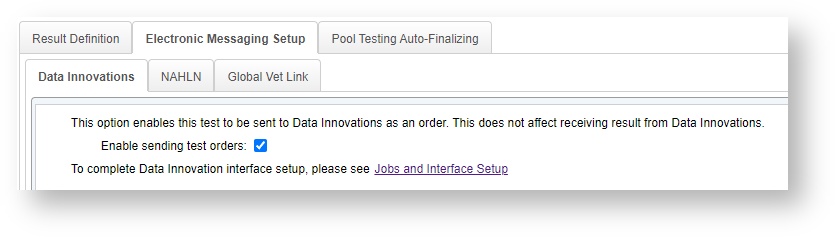
Turn on Electronic Messaging Setup if you will be sending these tests as an order to Data Innovations.
This will send the order with all of your Isolate sub tests.
Add Isolate as a Sub Test to your main culture tests
Once the Isolate test is set up, it can be used on all of your culture tests.
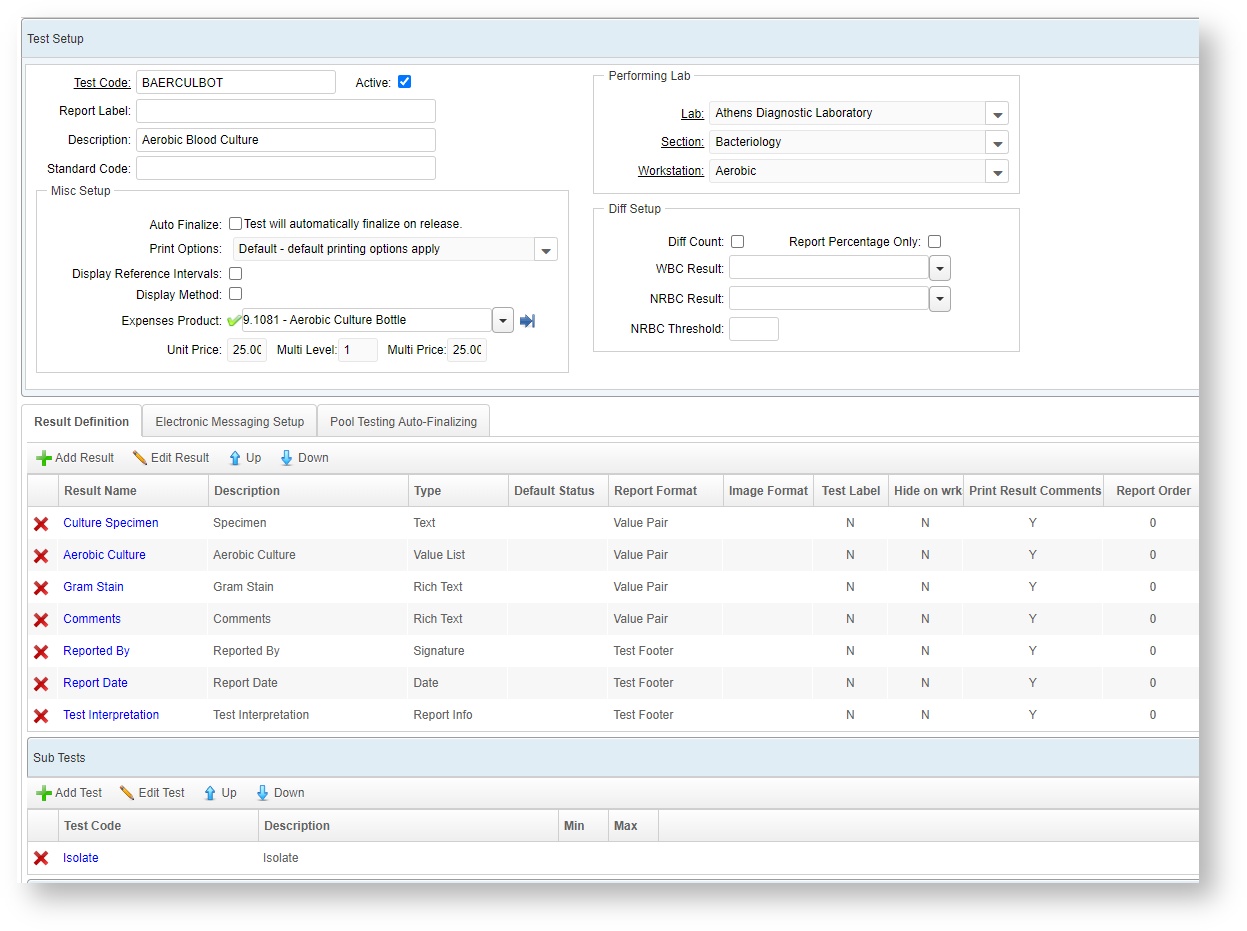
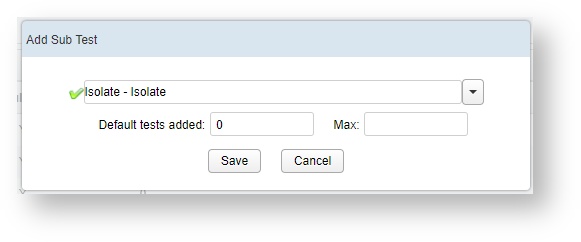
Click on the Add Test button under the Sub tests section. To have the subtest automatically pull in, set the Default Tests Added to 1. To have it be an optional Child Test instead, leave it as a 0.
When Default Tests Added is 0, the Isolate is still available as a Child Test on the Result Entry screen, but will not automatically display. It can be added if the Isolate is performed.
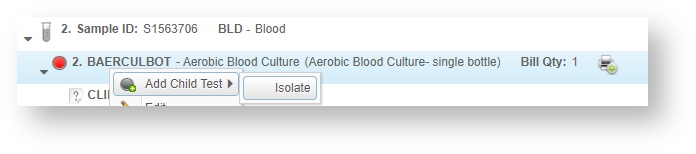
Once added, the child test displays in the Result Entry tree. Select the Pattern row to open up Pattern Result Entry.
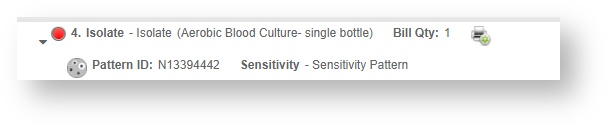
The Pattern ID will automatically be assigned when the child test is added.
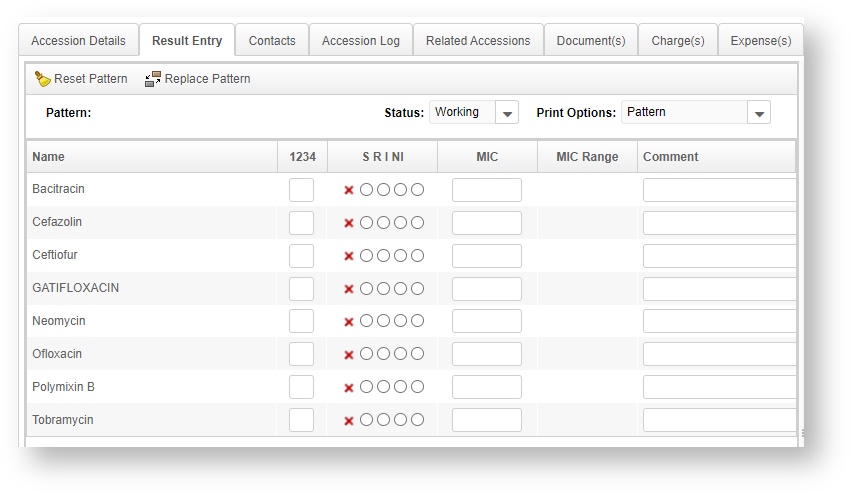
Result Entry of Sensitivity Patterns
Result Entry for all Patterns appears like this in the Result Entry screen.
The items that appear in this list are what were created in the original Pattern Setup for the Sensitivity result type.
VetView Wiki Most recent releases of VetView: Version 5.0.5 and 4.2.12 (released 5/16/2025)