Version 2.1 and Greater API Web Services Documentation
Cathy Allison
Andrew Hanneman
Abraham Westfall
2.1 API Web Services Documentation
Additional Technical Instructions for Custom Web Services (Child pages to this one)
Contents on This Page
How do start making my own custom web services?
How do I open a Web Service Interface API job?
Start by clicking on Add Interface or Job from the same page as the Jobs and Interfaces above.
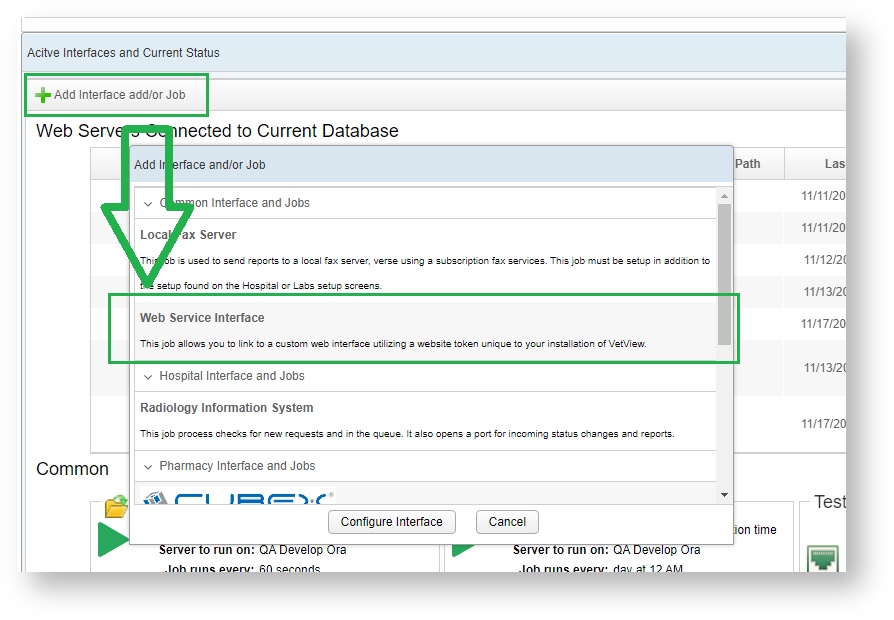
Double click the Web Service Interface job to add a new instance of it, or select it from the list and click on Configure Interface.
The Web Service Interface settings window will open
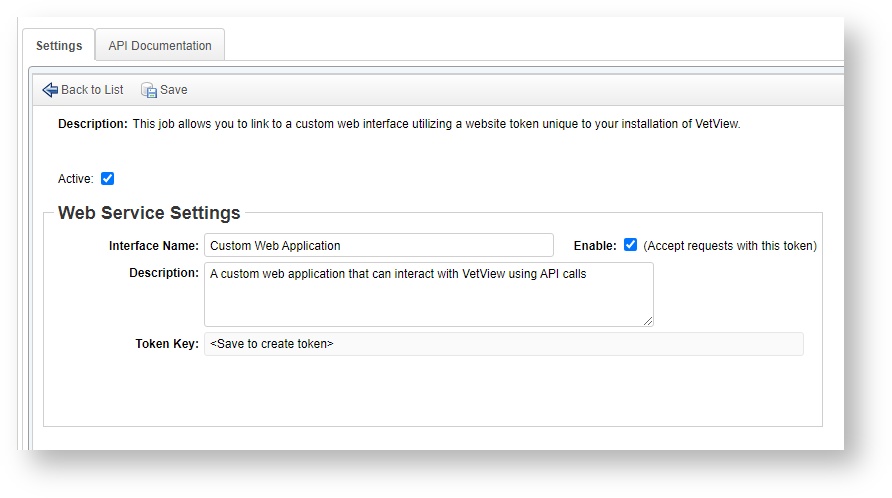
Give your custom app a name. You can name it whatever you want, but it may be best to consider a name related to the API Service you will be using, such as "UGA's COVID Testing Website" or "Lab Testing Android Application."
Click on the Save button to generate the token.
Copy the token. This is necessary to start the push or pull of information to VetView.
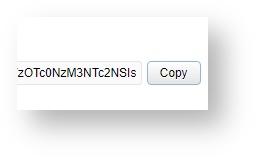
Each token is unique to your installation of VetView, for security reasons, and the token is partially hidden in its window as well. The Copy button will take the full token and put it in your clip board. You can consider pasting it temporarily into Notepad while working with Swagger, to avoid having to go back and copy it again each time.
When developing custom applications, this token will need to be identified in the header of the website or app so that VetView will accept it.
VetView supports multiple instances of the custom Web Service Interface Job only, All other jobs can only have a single instance running across all web services.
How do I view the available web services?
Click on the API Documentation tab that appears on the Web Service Interface job. This will open your local VetView's installation of Swagger, the utility we provide for our API Documentation within VetView. This documentation is updated live, unlike our Wiki, so every API example that displays on our Swagger page is already in your current version of VetView. (For more information on Swagger, visit https://swagger.io/ .)
As such, this page should be used as a "how-to" and not as a list of current available API jobs!

List of API calls
The API calls in Vetview are organized by function.
Click on a function on the tree on the left to view the current available calls.
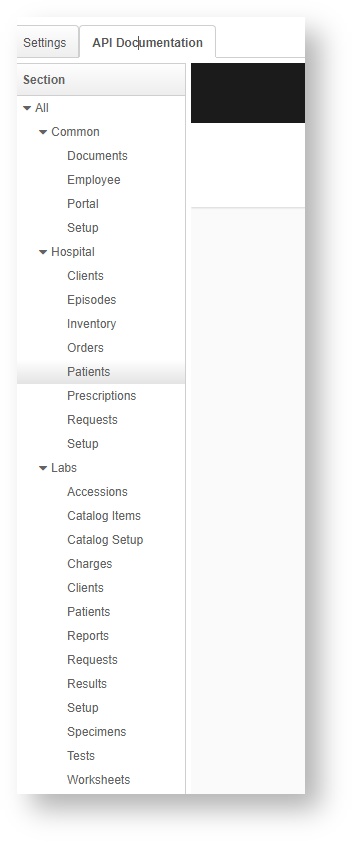
Click on one of the sections.
The most up to date available API web services will display to the right.
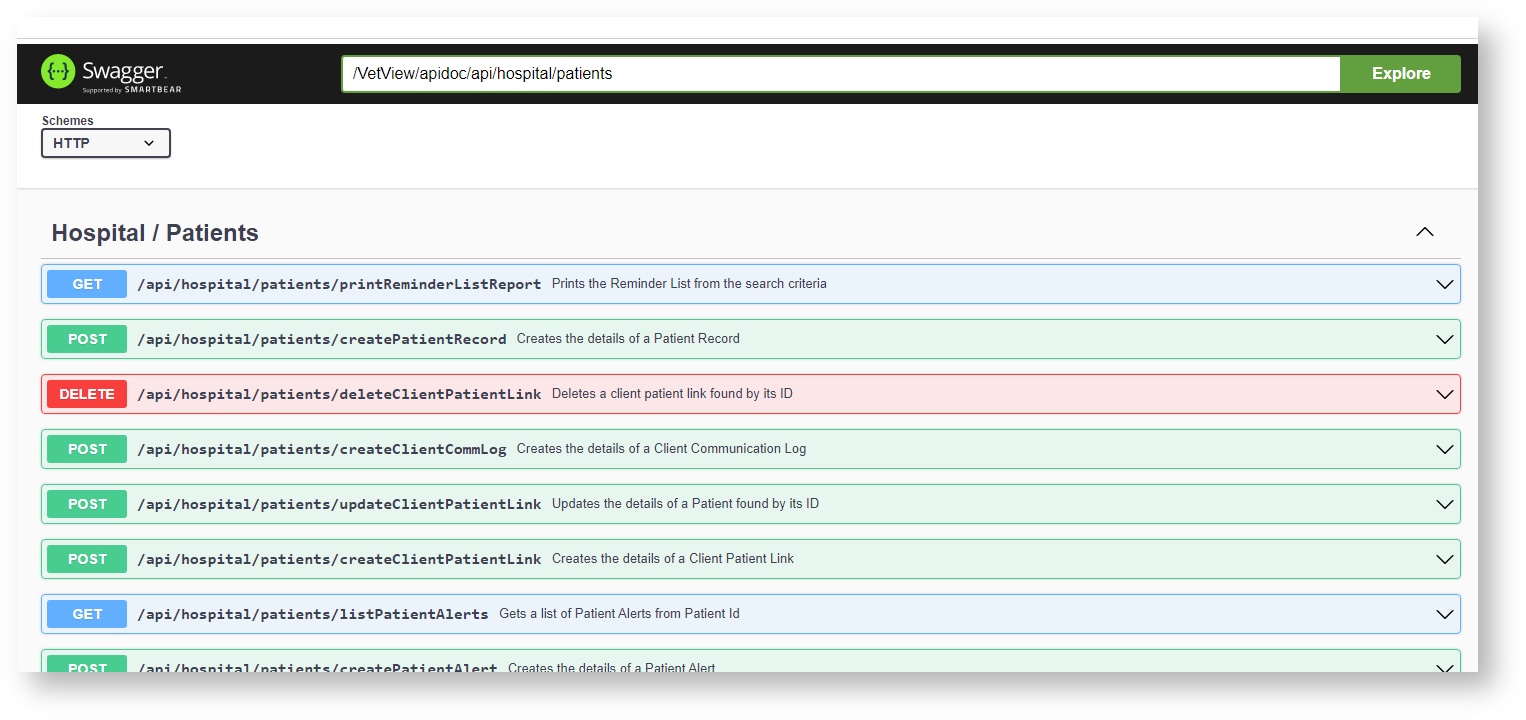
View Details of a Web Service Call
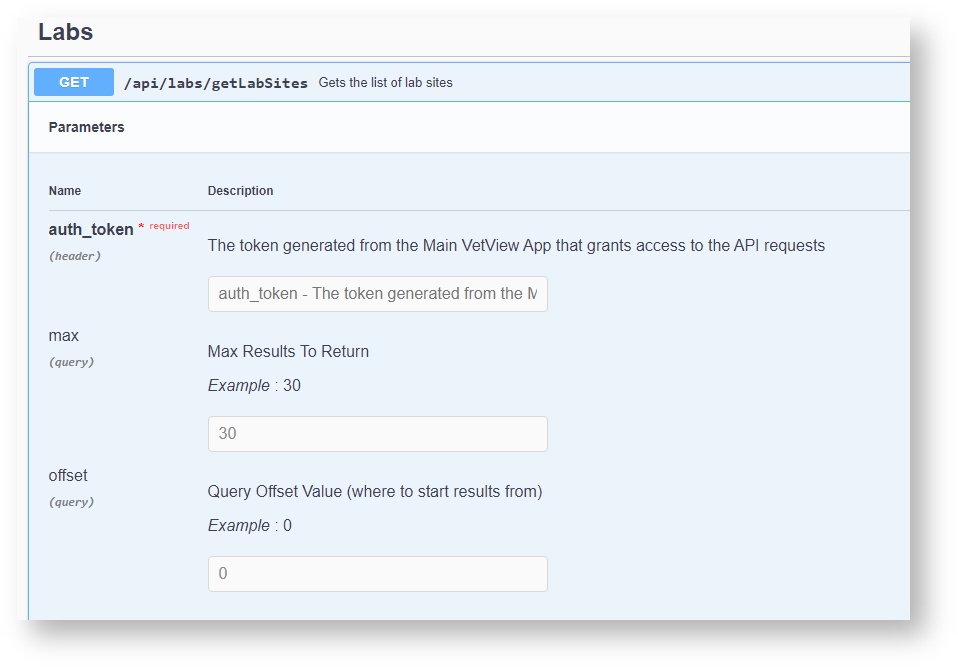
Click on one of the web service calls to view additional details.
The required parameters that your website or phone app will need to provide are displayed in the Parameters section.
What are the types of Web Service calls?
The three command types that VetView supports are Get, Post, and Delete.

How do I test each Web Service call?
Swagger includes the ability to "try it out" against your installation of VetView. You will need the authentication token (copied and pasted from the Job) and any parameters required by the query itself.
Get Requests

Click on the Try It Out button, and then enter in the token.
Then click on the Execute button below the parameters.

| Response Code | Definition |
|---|---|
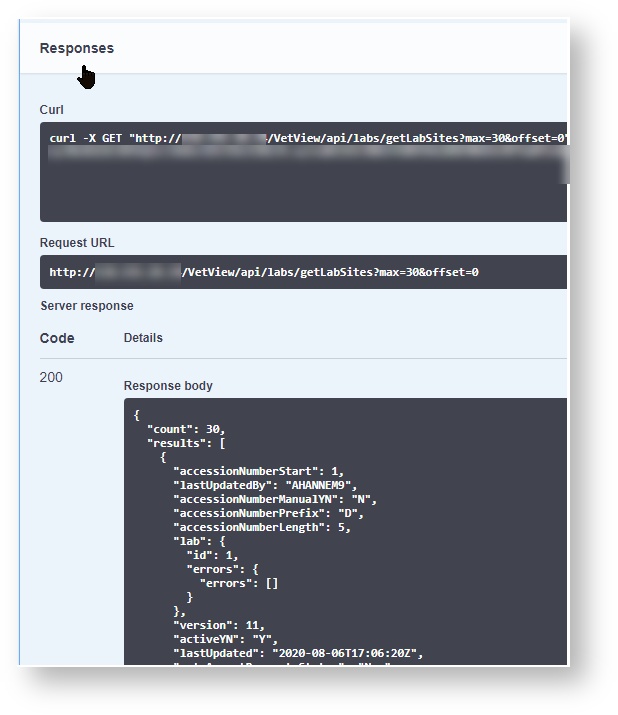
| 200 | Successful operation (server accepted and responded with data.) |
| 401 | Not authorized. Server responded but refused the connection. Double check your token. |
| 404 | Method not found (contact VetView) |
| 405 | Method not allowed (contact VetView) |
| 406 | Error in Field Object. The submitted information in the Object Body is not correct. Double check what you have submitted. |
A Successful Operation will generated the live code that VetView will return to the submitted query.
Post Requests
Post Requests are very similar but you will also need to include the "body" object that you want to submit as a change. An example of how this must be formatted will load when you click on Try It out.
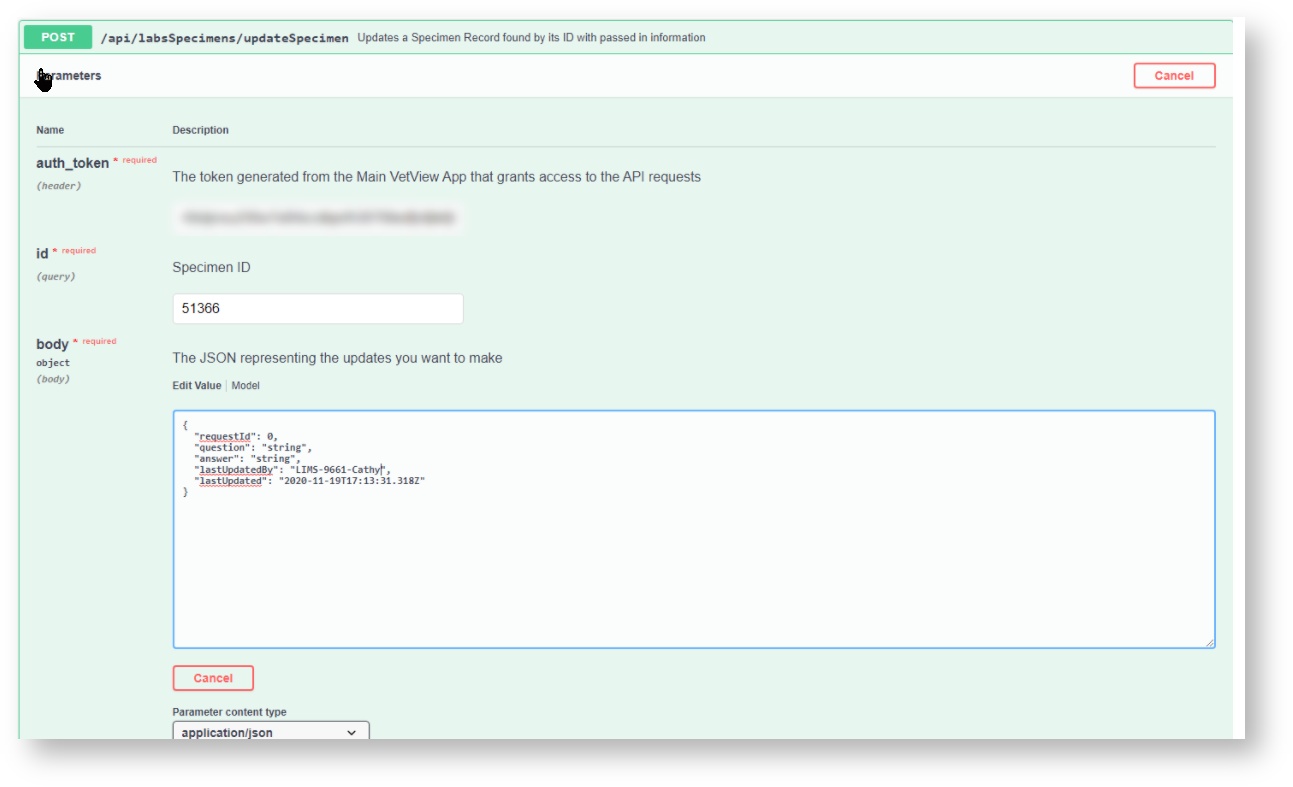
When Successful, you will be able to see your data added back into your live system.
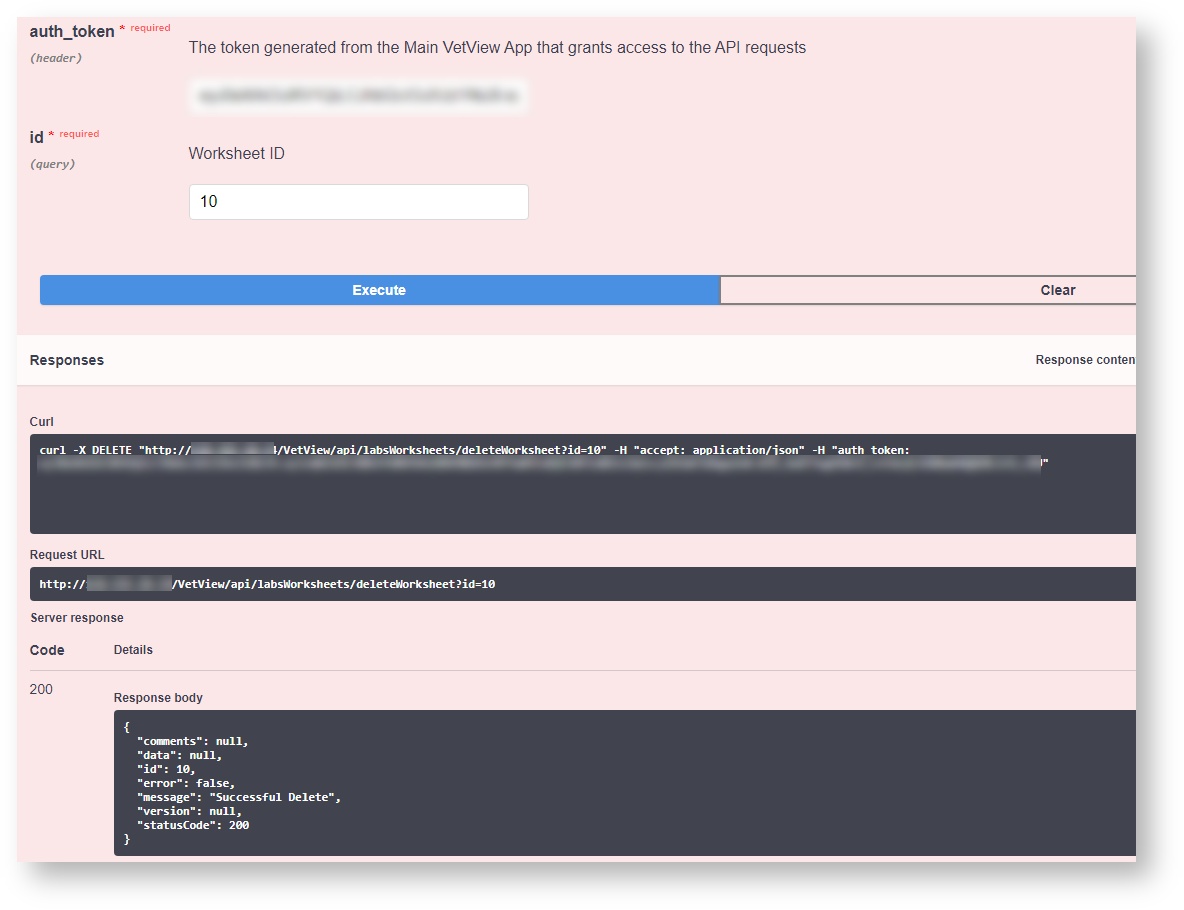
Delete Requests
Make sure you have a valid parameter you are willing to remove permanently from the database during testing. Click on the Execute button to perform the action.
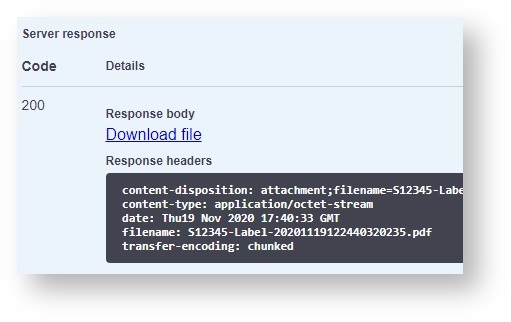
How do I use the GET commands that generate downloadable objects, such as PDFs?
Reports and labels can be access with GET commands. For example, to generate the Specimen Label, enter in the authentication token and the specimen ID.
The system will generate the PDF of the Specimen Label based on the system report as a downloadable file. This can then be printed to a network printer on the user's system, just like inside VetView
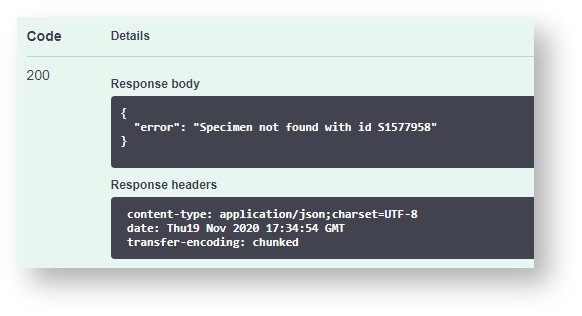
What happens if I get a successful response but it still includes an error?
If your server response was successful (contact with the server) but the return message includes an error, that is usually an indication of missing information from the test query submitted.
In this example, the Update Specimen method does not include a valid RequestID. When your application developers write their queries using our Web Services, you must be sure to include valid choices from the GET procedures so that they can be successfully submitted during the subsequent POST procedures.
It may take some trial and error to identify the correct way to format each query in your application. Error codes may also be specific regarding the issue, such as the submitted data not existing in the database, even if it has been formatted correctly.
VetView Wiki Most recent releases of VetView: Version 5.0.2 and 4.2.8 Hotfix (Released 12/20/2024)
To see commonly used terms in VetView Hospital, please visit our Hospital Glossary of Terms.