How do I customize the schedule screen?
How do I customize the schedule screen?
Changing the Schedule Screen layout
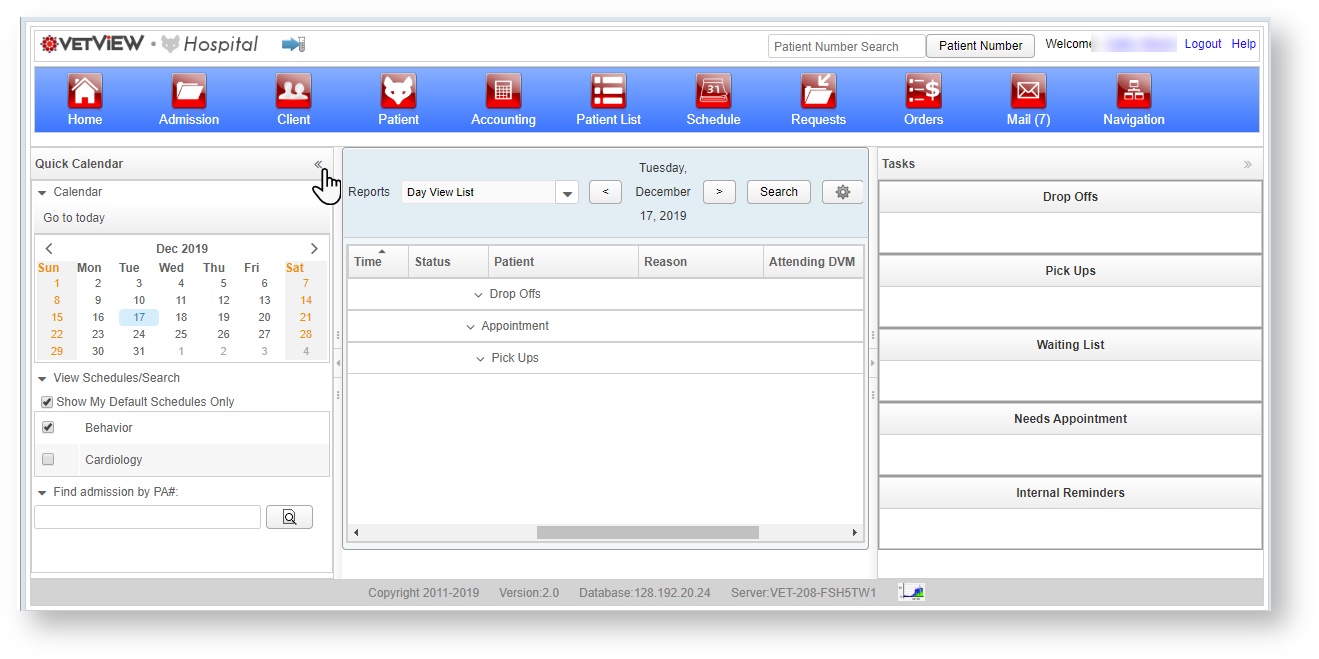
The Schedule Screen has three major sections: The left panel, the center panel, and the right task panel. The panels can be opened and closed independently by clicking on the small arrows on the top of the panel. They will open back up again by default the next time you visit this screen.
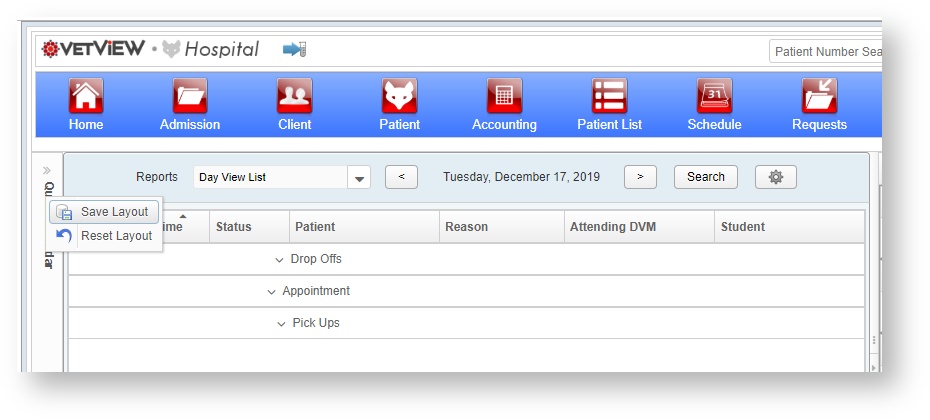
The left and right panels can be hidden more permanently if you will never use those features, such as using an account for a kiosk view. Right click on the panel in the state you want to save it, and then click on Save Layout. Once Saved, these will now be defaulted to the state that you saved them in, and they will load that way the next time you visit the screen. You can restore them to open by click on Reset Layout.
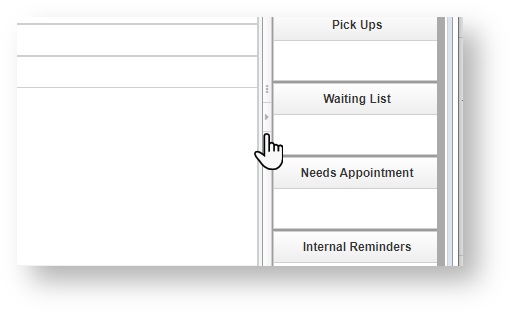
You can also adjust the width of the side panels, if you want to see them but make them narrower or wider. Grab the edge and drag it to where you want it. Then right click to Save Layout. They will be in the place you Saved them the next time you log in.
User Preferences
The schedule screen User Preferences can be opened at the top of the screen by clicking on the small gear icon.
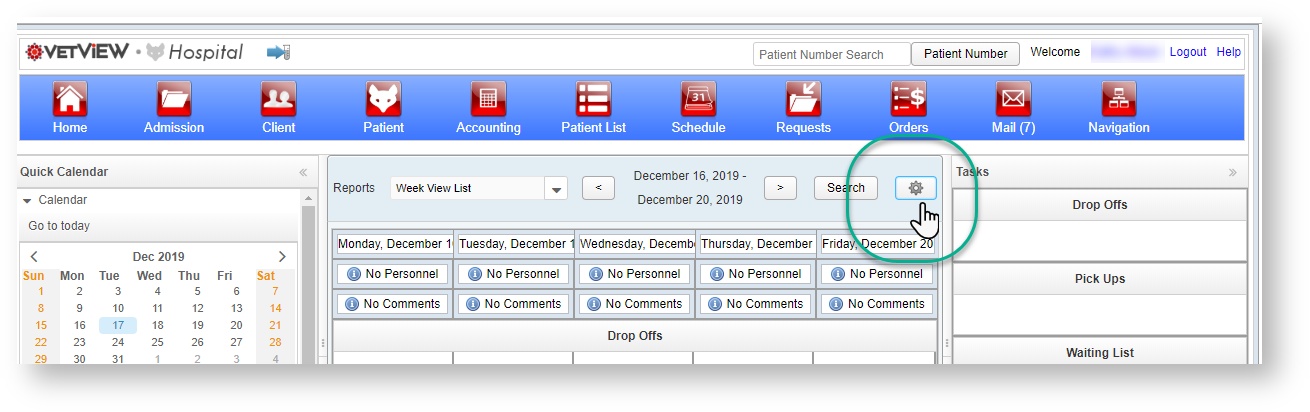
This opens a large window that includes on/off switches for many preferences, as well as a place to select the default schedules that will load when you first open the window.
Schedule Preferences WindowDefault Schedule View: This is the view that will load each time you open the schedule preferences window.You can switch views at any time, but if you leave the screen and come back, it will default to this view. Minimum Column Size: This allows you to establish how narrow the columns can shrink before they stop and a scroll bar appears instead. This is only applicable to Day and Week Calendar View. If your schedule frequently has many time slots starting at the same time, you can consider changing the size to large to avoid too much overlap. Time Scale: This lets you set the height of each of the cells in the calendar view. We recommend an hour for most monitors and schedules, but if you have shorter appointments in some of your services, you can consider dropping down to 30 or even 15 minutes to see more detail on each of your appointments. Auto Refresh: This is how frequently the passive refresh will check changes to the database and display them on monitors. For most kiosks, 2 minutes should be enough, but for active schedules that have multiple users working in them, you may want to drop down to 60 seconds. Note that in the event two users schedule an appointment in the same time slot before their screens refresh, no data will be lost - one appointment will become orphaned instead. Default Drop Off and Pick Up Times: This is the time that will automatically fill in when a new drop or pick up time is created. You can manually adjust this time to something else if that is arranged with the client. Show 24 Hour Schedule: This is turned off by default and the schedule will be limited to the "business hours" that are set in Hospital Setup. Turn this on to see all hours. Useful for emergency services and overnight shifts. Show Only Work Week: This is turned on by default and hides Saturday and Sunday. Turn this on if your unit sees patients during weekends. Displayed Deceased Appointments: When this flag is off, then appointments that were for deceased patients will drop from the schedule. The time slots are available to re-use. For managers, turn this on to see any appointments for patients marked as deceased in the system, if you want to manually cancel them or to count them for reporting purposes. These appointments always appear as black on the schedule. Display Cancelled Appointments: When this flag is turned off, cancelled appointments drop from the schedule and the time slot is available to re-use. Schedule managers may turn this flag on to follow up on cancelled appointments, if desired. Display Open Time Slots: This is only applicable to the List Views. When this flag is turned on, time slots with no patients will show on the view. When the flag is turned off, only time slots with scheduled patients appear. This may be useful for kiosk views. Hide and Display These Schedules: The list on the left contains all the schedules that are available in the system - they are set to Active under Hospital setup. (Inactive schedules do not appear.) Click on a schedule on the left to select it, and then click on the rightward facing arrow on top to move it to the right list. The right list contains all the schedules that will display by default in the left panel of the Schedule screen. To have these schedules also load in the central panel, click on the check box next to the schedule name. In the exampl to the left, "Clean Behavior Schedule" will load in the central panel, but the three cardiology schedules will also be available for quick access. |
|

Turning on and off Schedule Columns
The schedules that appeared in the right list under Display These Schedules will load in exactly that way under the View Schedules/ Search on the main screen's left hand task panel.
These schedules can be temporarily hidden by unchecking the box, or temporarily show by checking the box. You can display multiple schedules on all of the Day views. Week Views are limited to a single schedule at a time.
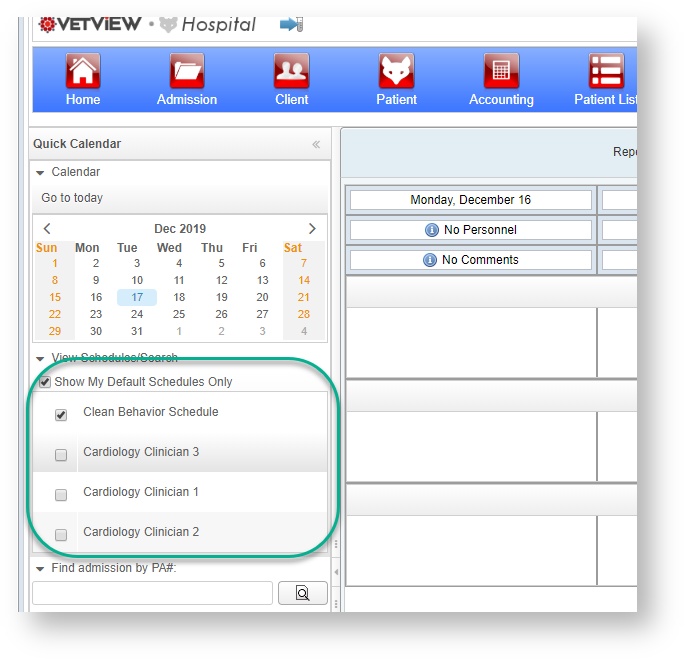
Even if you change them temporarily, they will always default to the way you have them set up under User Preferences.
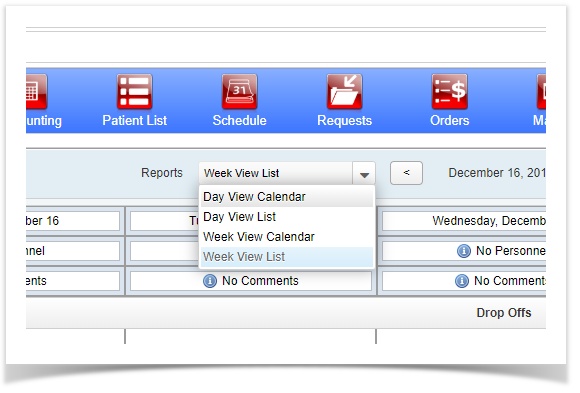
Changing to Day, Week, List, and Schedule views
VetView provides four basic Views that allow you to see the schedule from different perspectives. Because no hospital unit or service area uses the schedule in quite the same way, these alternate views will provide you with the best way for your service to interact with the schedule and get the most use out of it.
Turning Groups on and off
Both the central panel list views and the right hand task panel have the appointments sorted into "groups." These groups can be temporarily or permanently turned off by default if your service area doesn't use that workflow.
For example, if your unit doesn't use the Drop Offs or Pick ups, you can right click on the Drop Off group heading and click on Remove Group. Do the same for Pick Ups.
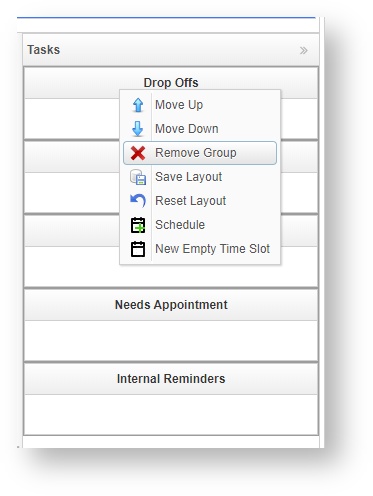
When you are down to only the groups that your service area will use, you can right click and choose Save Layout. This will preserve the groups you have hidden, so that they don't come back the next time you load the schedule screen.
If you ever want to bring them back, you can choose Reset Layout.
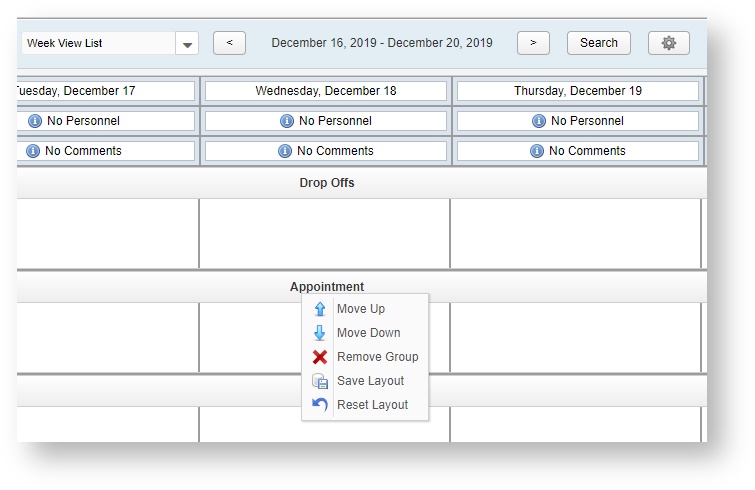
You can also sort these groups and move them up or down. For example, in the central panel Week View List, you can move your Appointments to the top, and then click on Save Layout.
VetView Wiki Most recent releases of VetView: Version 4.1.3 Hotfix (Released 2/16/2024)
To see commonly used terms in VetView Hospital, please visit our Hospital Glossary of Terms.